Final Project
Claire's Snap Shots
Overview:
- Demo Video
- Inspiration and Motivation
- How To Use It
- In Brief, How It Works
- Hardware
- Materials
- Pin Layout
- Software
- Final Code
- The Process: Fabrication
- Making the Press-Fit Box
- Making the Vacuum-Sealed Shotglass Containers
- The Process: Writing the Code
- SPI Display Code
- Buttons and Screens
- 2D Array, Excel, and RFID Reading
- Future Hopes
- More Shotglasses
- LED Integration
- Website Integration
- Button Usage
Final Project Guidelines
Final projects should integrate most of the skills covered over the semester, including at a minimum:
- 3D design and fabrication (either mold/cast, 3D print, lasercut, etc.)
- Electronics (input and output)
- Microcontroller programming
Demo Video
link to video if it's not working properly
Inspiration and Motivation
So I thought to myself: what do I uniquely need?
Well, I collect shotglasses! Each shotglass represents a unique memory, often one spent on vacation in a new place with people I love. My collection numbers more than 80 by now, giving me a whole host of unique needs: how do I transport and display 80+ shotglasses? And how do I keep track of all of them?
I originally planned on creating some kind of modular, scalable transportation system (see my original project proposal) to more easily and safely transport many shotglasses, but Ibrahim gave me some excellent advice: why not create something that highlights the uniqueness of each shotglass?
Project Goal: Create a device which tells the user unique information about whichever of my shotglasses is placed upon it.
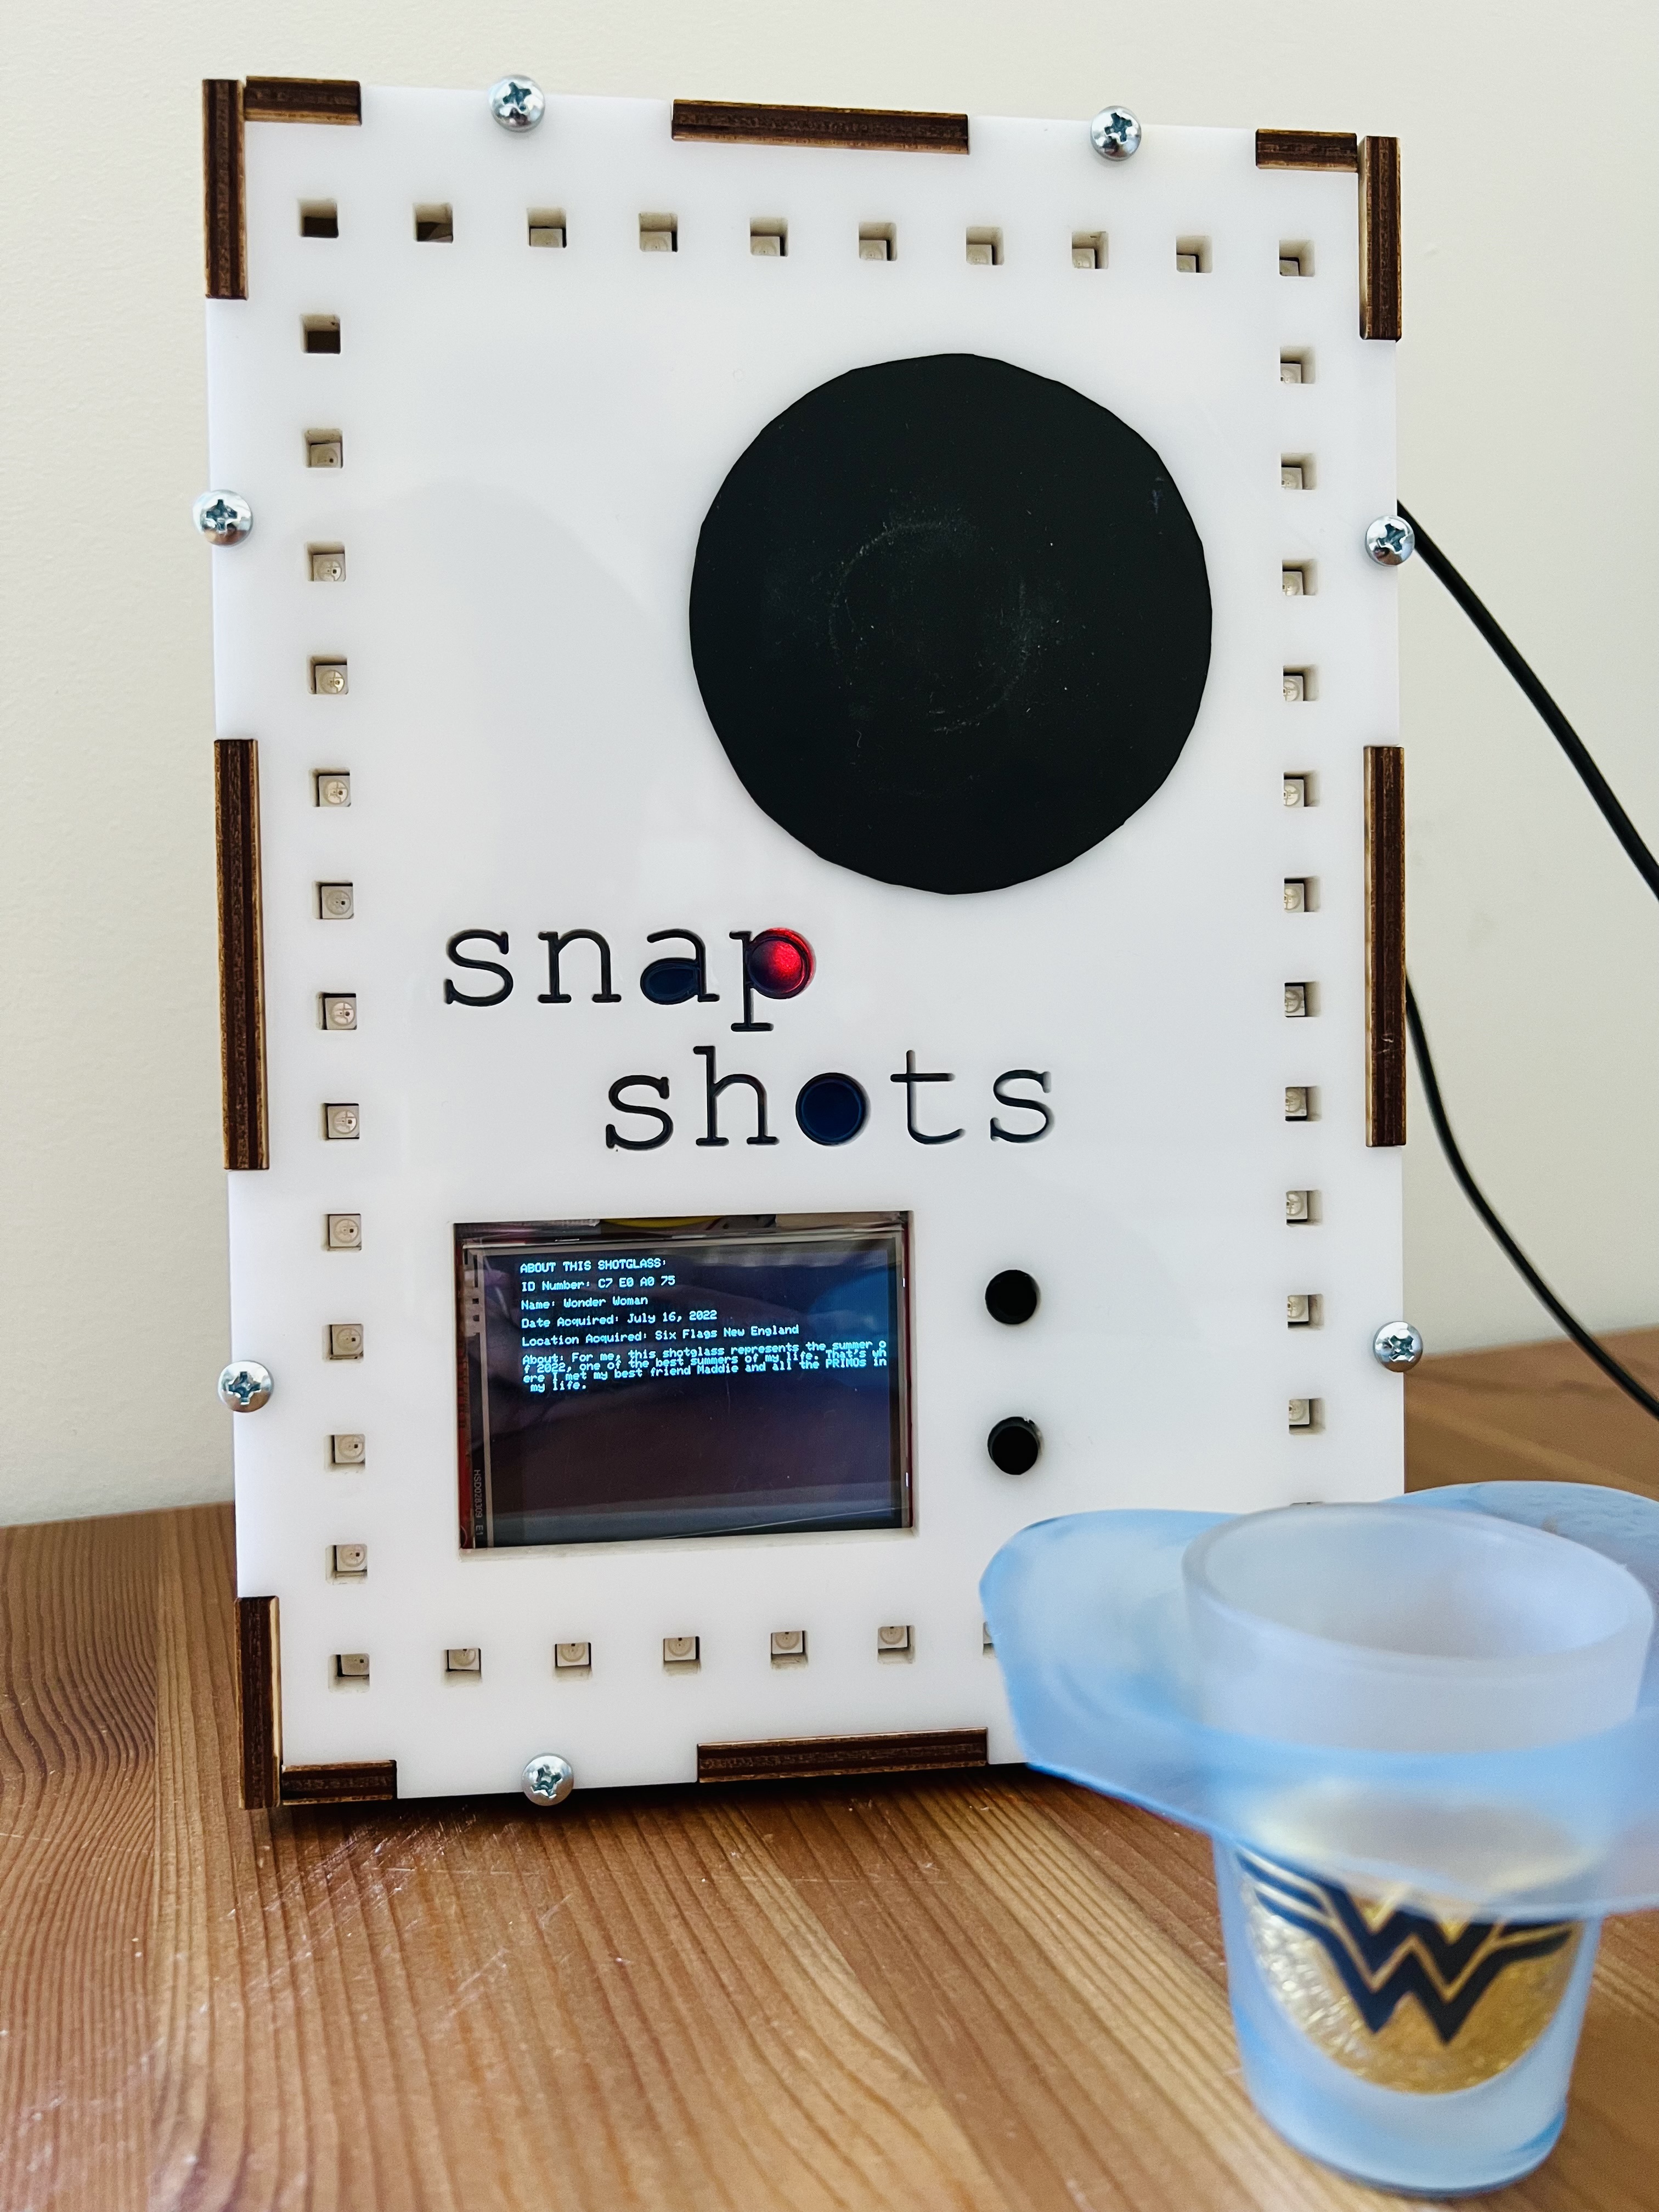
Thus, my final project became Snap Shots! Any user can place a pre-tagged shotglass on my Snap Shots box, then read more about the shotglass on the screen below. The box is compact and easy to transport, perfect for a shelf or coffee table. I plan on laying it next to several shotglasses so guests can play around with it. What's more, Snap Shots helps me keep track of all the shotglasses I've accumulated: when I got them, where I got them, and what memory they each encapsulate.
How to Use Snap Shots
- Plug the cord into any 5V power source with a USB-A input.
- Place a (pre-tagged) shotglass on the black circle.
- Read more about the shotglass on the screen below!
- You can use the up and down buttons to click through different screens. Currently, there are only 3 screens: one that tells you more about the shotglass, one that explains what the LED lights signify, and one that gives the link of this PS70 portfolio website.
In Brief, How it Works
Hardware
1. Materials
Primary Hardware:
- Mifare 13.56Mhz RC522 RFID Card Reader Module
- 2.8" SPI 320x240 RGB LCD Touch Module Display
- Full Color LED Pixel Strip
- 1 ESP32-DevKitM-1 (ESP32-MINI-1(1U)-based board) and cord
- 1 ESP32-S2 and cord
- 0.236 inch white cast acrylic
- 0.236 inch plywood sheet
- 8/36 3/4 inch screws and nuts
- thin scrap light blue translucent acrylic (for letters)
- transparent plastic sheet (screen protector)
- scrap black cast acrylic (for buttons)
- black rubber adhesive (for "place shotglass here" circle on box)
- 2 tactile buttons
- lots of wires
- breadboard
- command strips (for securing breadboards in box)
2. Pin Layout/Wiring Diagram
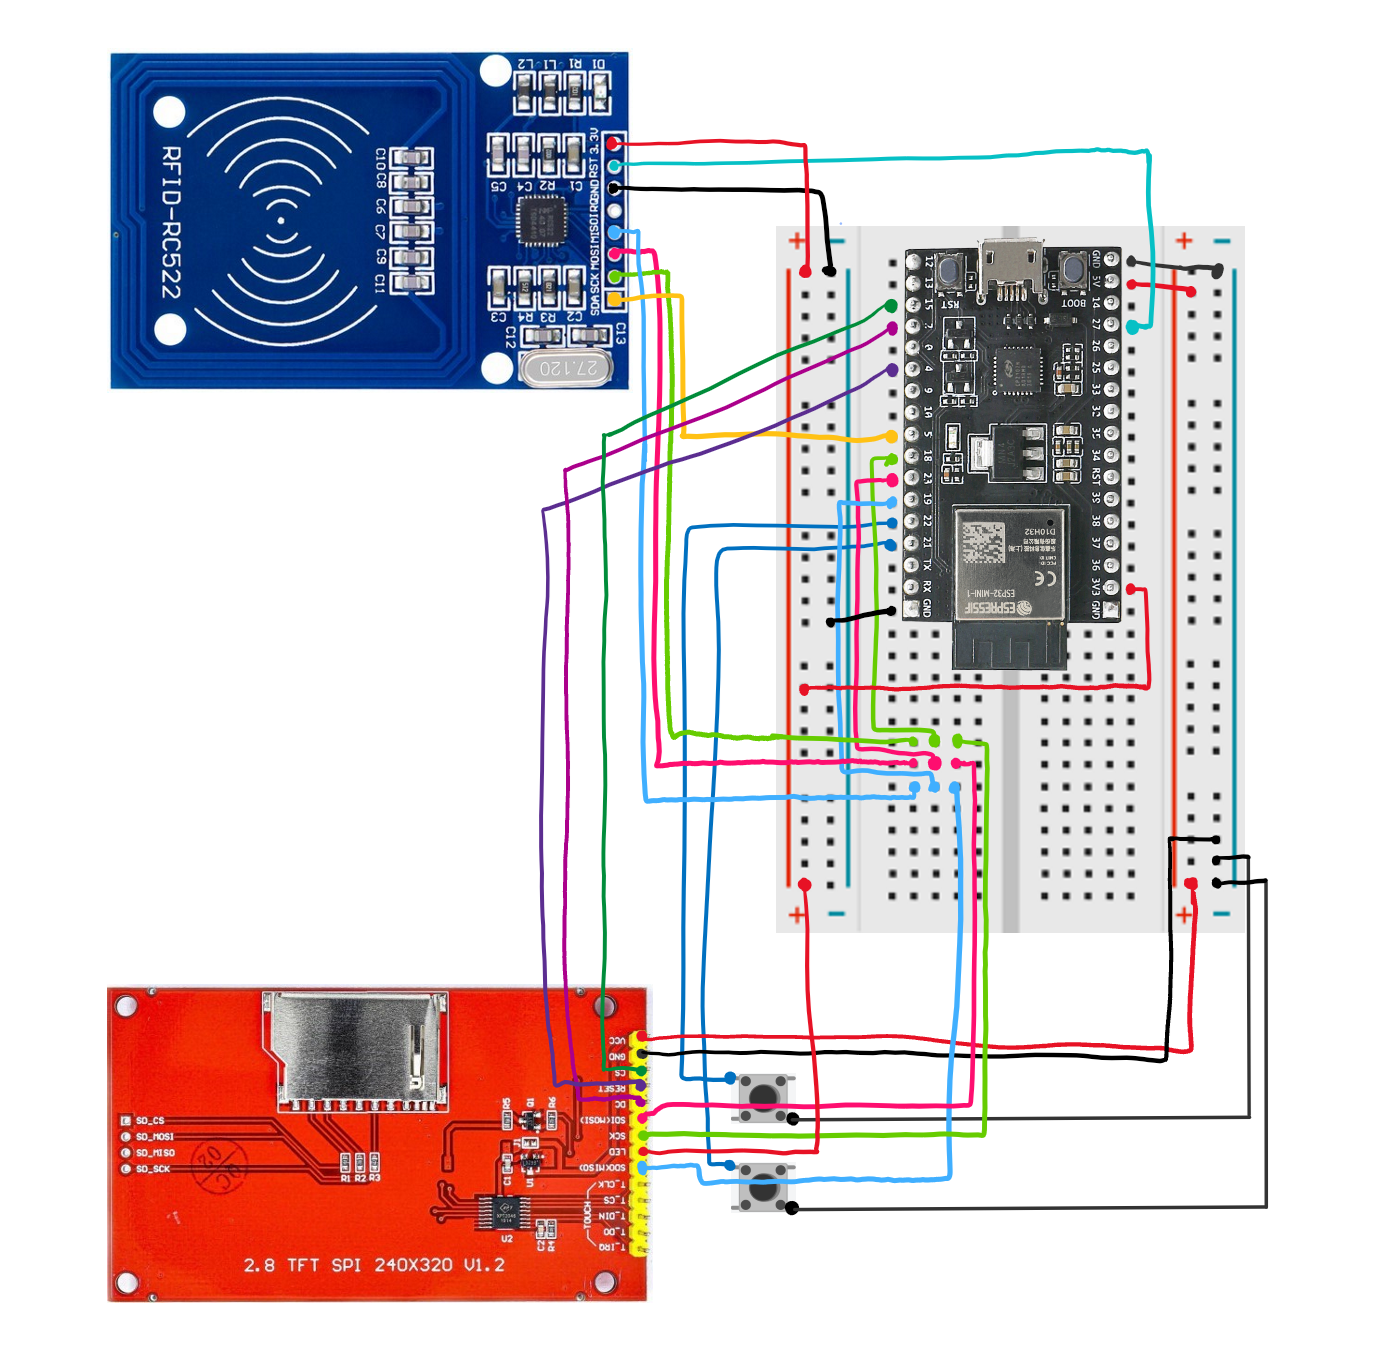 RFID Reader Pin Layout --> ESP32-DevKitM-1:
- SDA --> GPIO5
- SCK --> GPIO18
- MOSI --> GPIO23
- MISO --> GPIO19
- IRQ disconnected
- GND --> GND
- RST --> GPIO27
- VCC --> 3.3V
- VCC --> 5V
- GND --> GND
- CS --> GPIO15
- DC --> GPIO2
- RESET --> GPIO4
- SCK --> GPIO18
- MOSI --> GPIO23
- MISO --> GPIO19
- LED --> 3.3V
- T_ (touch pins) disconnected
- Up Button Top --> GPIO22
- Down Button Top --> GPIO21
- Up Button Bottom --> GND
- Down Button Bottom --> GND
Software
Final Code
Altogether, here is my final code for the ESP32-DevKitM-1!
/*Screen Number
1 = Main screen
2 = LED KEY
3 = WEBSITE LINK or QR Code if time
*/

int screen;
String shotID;
int shotrowind;

///////////////////////////////////////////
/*BUTTON STUFF*/
#include <ezButton.h>
#define DEBOUNCE_TIME 50 // the debounce time in millisecond, increase this time if it still chatters
ezButton upbutton(22); // create ezButton object that attach to pin GIOP21
ezButton downbutton(21); // create ezButton object that attach to pin GIOP21


///////////////////////////////////////////
/*RFID STUFF*/
#include <SPI.h>
#include <MFRC522.h>

//#include "Constants.h"
#include <WiFi.h>
#include <HTTPClient.h>
#include <ArduinoJson.h>

#define SS_PIN  5  //ESP32 pin GIOP5
#define RST_PIN 27 //ESP32 pin GIOP20

MFRC522 rfid(SS_PIN, RST_PIN);


//PIN SETUP:
//ESP32-Mini
//SDA --> ESP32 5 GPIO5
//SCK --> ESP32 11 GPIO18
//MOSI --> 23 GPIO23
//MISO --> 19 GPIO19
//IRQ attached to nothing
//GND --> GND
//RST --> 27 GPIO27
//VCC --> 3.3V

//WIFI PASSWORD STUFF
const char* ssid = "MAKERSPACE";
const char* password = "12345678";


///////////////////////////////////////////
/*NEOPIXEL STUFF*/
#include <Adafruit_NeoPixel.h>

#define LED_PIN   38   //not 9 The pin connected to the NeoPixels.
#define LED_COUNT 20  //The number of NeoPixels attached.
#define DELAY_VAL 100


//Declare our NeoPixel strip object:
//Arg 1: # of pixels; Arg 2: Arduino pin #; Arg 3: pixel type flags, add together as needed

Adafruit_NeoPixel strip(LED_COUNT, LED_PIN, NEO_GRB + NEO_KHZ800);


///////////////////////////////////////////
/*FONT STUFF*/
//  A processing sketch to create new fonts can be found in the Tools folder of TFT_eSPI
//  https://github.com/Bodmer/TFT_eSPI/tree/master/Tools/Create_Smooth_Font/Create_font

//  This sketch uses font files created from the Noto family of fonts:
//  https://www.google.com/get/noto/

#include "NotoSansBold15.h"
#include "NotoSansBold36.h"

// The font names are arrays references, thus must NOT be in quotes ""
#define AA_FONT_SMALL NotoSansBold15
#define AA_FONT_LARGE NotoSansBold36

#include <SPI.h>
#include <TFT_eSPI.h>       // Hardware-specific library

TFT_eSPI tft = TFT_eSPI();


//CREATE ARRAY
const int n_shotglasses = 5;
const int n_parameters = 8;
//1 (ID) 2 (Name) 3 (Date acquired) 4(Location acquired) 5(About) 6(Favorite?) 7(Gift?) 8(Outside US?)
String shots[ n_shotglasses ][ n_parameters ] = {
{"D7 F2 A1 75", "Luca's Hometown", "January 6th, 2023", "Basel, Switzerland","This shotglass represents winter break of 2022-2023, one of my favorite breaks of all time which I spent with my best friend Maddie, Luca, Stephanie, and Izzy from UCambridge! This shotglass came specifically from a shop in Basel, Switzerland, the hometown of my friend Luca where we stayed at his home for a night before heading to the Swiss alps for some snowboarding. Earlier on the trip we visited Madrid and London, too.","Yes","No","Yes"},
{"D0 91 35 40", "Yellowstone", "Summer of 2013", "Yellowstone National Park","I got this shotglass and my Jackson Hole shotglass during a family vacation to Yellowstone National Park. I loved that trip. We drove through maybe 4 states? Including straight across Montana! So beautiful and so nice to see a different side of the states.","Yes","Yes","No"},
{"57 C0 92 75", "Heart Art", "January 26th, 2022", "Dora's Place in Leverett House, Cambridge, MA","My good friend Dora gave me this shotglass (and the New York one!) when I came to visit her in Lev Tower after winter break in sophomore year.","No","Yes","No"},
{"37 FA A1 75", "Texas", "November 2017", "Dallas, TX","I got this shotglass in Dallas during the 2017 SPJ Student Journalism Convention back when I was a sophomore in high school! I went with all the editors of my high school newspaper The Spoke, of which I would become editor-in-chief in senior year.","No","No","No"},
{"C7 E0 A0 75", "Wonder Woman", "July 16, 2022", "Six Flags New England","For me, this shotglass represents the summer of 2022, one of the best summers of my life. That's where I met my best friend Maddie and all the PRIMOs in my life.","Yes","No","No"}
};


///////////////////////////////////////////
void setup(void) {
  //Initialize important variables
  screen = 1;
  shotID = "";
  shotrowind = 0;

  //Begin Serial Monitor
  Serial.begin(9600);

  //BUTTON
  downbutton.setDebounceTime(DEBOUNCE_TIME); // set debounce time to 50 milliseconds
  upbutton.setDebounceTime(DEBOUNCE_TIME);

  //RFID
  // Connect to the wifi
//  WiFi.begin(ssid, password);
//  while (WiFi.status() != WL_CONNECTED) {
//    delay(1000);
//    Serial.println("Connecting to WiFi");
//  }
//  Serial.println("Connected to the WiFi network");

  SPI.begin(); // init SPI bus
  rfid.PCD_Init(); // init MFRC522

  Serial.println("Tap an RFID/NFC tag on the RFID-RC522 reader");

  //NEOPIXEL
//  strip.begin();
//  strip.show(); //Initialize all pixels to off.
//  strip.setBrightness(12);


  //SCREEN
  tft.begin();
  tft.setRotation(3); //Set orientation of screen
  tft.setTextColor(TFT_WHITE, TFT_BLACK, true); // Set the font colour AND the background colour
  tft.setCursor(0, 0); // Set cursor at top left of screen
  tft.setTextWrap(true); // Wrap on width
}


void loop() {
  //NEOPIXEL

//  for(int i=0; i<LED_COUNT; i++) {
//    strip.rainbow(65535-(i*6553),1,255,255,true);
//    strip.show();
//    delay(100);
//  }

  //DISPLAY

  /*DISPLAY*/
  if (screen == 1) {
    if (shotID == "") {
      tft.fillScreen(TFT_BLACK);
      tft.setCursor(0, 0); // Set cursor at top left of screen
      tft.loadFont(AA_FONT_SMALL);    // Must load the font first

      tft.setTextColor(TFT_WHITE, TFT_BLACK, true); // Set the font colour AND the background colour
      tft.println("Thank you for choosing Snap Shots!");
      tft.println("Please place a shotglass on the circle to get started.");
      tft.unloadFont(); // Remove the font to recover memory used
    }
    else {
      tft.fillScreen(TFT_BLACK);
      tft.setCursor(0, 0); // Set cursor at top left of screen
//      tft.loadFont(AA_FONT_SMALL);    // Must load the font first
      tft.setTextColor(TFT_CYAN, TFT_BLACK, true);

      tft.println("ABOUT THIS SHOTGLASS: ");
      tft.println("");


      tft.print("ID Number: ");
      tft.println(shots[shotrowind][0]);
      tft.println("");

      tft.print("Name: ");
      tft.println(shots[shotrowind][1]);
      tft.println("");

      tft.print("Date Acquired: ");
      tft.println(shots[shotrowind][2]);
      tft.println("");

      tft.print("Location Acquired: ");
      tft.println(shots[shotrowind][3]);
      tft.println("");

      tft.print("About: ");
      tft.println(shots[shotrowind][4]);
//      tft.unloadFont(); // Remove the font to recover memory used
    }
  }
  else if (screen==2) {
    tft.fillScreen(TFT_BLACK);
    tft.setCursor(0, 0); // Set cursor at top left of screen

    tft.loadFont(AA_FONT_SMALL);    // Must load the font first
    tft.setTextColor(TFT_WHITE, TFT_BLACK, true); // Set the font colour AND the background colour

    tft.setTextWrap(true); // Wrap on width
    tft.setTextColor(TFT_CYAN, TFT_BLACK, true);
    tft.println("LED KEY:");
    tft.println("");
    tft.println("Greens = A Gift");
    tft.println("Purples = From Outside America");
    tft.println("Rainbow = A Favorite Shotglass :D");
    tft.unloadFont(); // Remove the font to recover memory used
  }
  else {
    tft.fillScreen(TFT_BLACK);
    tft.setCursor(0, 0); // Set cursor at top left of screen

    tft.loadFont(AA_FONT_SMALL);    // Must load the font first

    tft.setTextColor(TFT_PURPLE, TFT_BLACK, true); // Set the font colour AND the background colour
    tft.setTextWrap(true); // Wrap on width
    tft.setTextColor(TFT_BLUE, TFT_BLACK, true);
//    tft.println("Get this -- Screen 3!!!");
    tft.println("You can find my website at https://guoingup.github.io/PS70-Digital-Fabrication/");
  }

  //WHILE LOOP
  while (true) {
    downbutton.loop(); // MUST call the loop() function first
    upbutton.loop();

    if (downbutton.isPressed()) {
      tft.fillScreen(TFT_BLACK);
      Serial.println("The down button is pressed");
    }

    if (downbutton.isReleased()) {
      Serial.println("The down button is released");
      Serial.print("Screen number was: ");
      Serial.println(screen);
      if (screen == 3) {
        screen = 1;
      }
      else {
        screen++;
      }
      Serial.println("Screen number is now: ");
      Serial.println(screen);
      break;
    }

    if (upbutton.isPressed()) {
      tft.fillScreen(TFT_BLACK);
      Serial.println("The up button is pressed");
    }

    if (upbutton.isReleased()) {
      Serial.println("The up button is released");
      Serial.print("Screen number was: ");
      Serial.println(screen);
      if (screen == 1) {
        screen = 3;
      }
      else {
        screen--;
      }
      Serial.println("Screen number is now: ");
      Serial.println(screen);
      break;
    }


    //CHECK FOR NEW SHOTGLASS:
    if (rfid.PICC_IsNewCardPresent()) { // new tag is available
    if (rfid.PICC_ReadCardSerial()) { // NUID has been readed
      // print Tag Type
      MFRC522::PICC_Type piccType = rfid.PICC_GetType(rfid.uid.sak);
      Serial.print("RFID/NFC Tag Type: ");
      Serial.println(rfid.PICC_GetTypeName(piccType));

      // print UID in Serial Monitor in the hex format
      Serial.print("UID:");
      String content = "";
      byte letter;
      for (byte i = 0; i < rfid.uid.size; i++) {
        Serial.print(rfid.uid.uidByte[i] < 0x10 ? " 0" : " ");
        Serial.print(rfid.uid.uidByte[i], HEX);
        content.concat(String(rfid.uid.uidByte[i] < 0x10 ? " 0" : " "));
        content.concat(String(rfid.uid.uidByte[i], HEX));
      }
      Serial.println();
      content.toUpperCase();
      Serial.println(content.substring(1));

      shotID = content.substring(1);

      //Iterate through the array to find the right shotglass
      for (int i = 0; i < n_shotglasses; i++) {
        if (shots[i][0] == shotID) {
          shotrowind = i; //Set shotglass ID to the right one in the array
        }
      }
      rfid.PICC_HaltA(); // halt PICC
      rfid.PCD_StopCrypto1(); // stop encryption on PCD
      break;
    }
  }
  }
}
I also separately programmed an ESP32-S2-SOLO for the NeoPixel LED Strip. It simply increments RGB values based on the pixel number, going from purple to more green.
          #include <Adafruit_NeoPixel.h>

            #define LED_PIN   9   //The pin connected to the NeoPixels.
            #define LED_COUNT 50//The number of NeoPixels attached.
            #define DELAY_VAL 100


            //Declare our NeoPixel strip object:
            //Arg 1: # of pixels; Arg 2: Arduino pin #; Arg 3: pixel type flags, add together as needed

            Adafruit_NeoPixel strip(LED_COUNT, LED_PIN, NEO_GRB + NEO_KHZ800);

            void setup() {
              strip.begin();
              strip.show(); //Initialize all pixels to off.
              strip.setBrightness(12);
            }

            void loop() {
              strip.clear();
              for(int i=0; i < LED_COUNT; i++) {
                 strip.setPixelColor(i, min(50+10*i,255),min(255-20*i,255),min(20+15*i,255));
                 strip.show();
                 delay(DELAY_VAL);
              }
            }
The Process: Physical Fabrication
1. Making the Press-Fit Box
As Nathan warned me, press-fit boxes are much harder to create than they appear at first glance!
Why Press Fit? I wanted my project to come in the form of a no-glue, press-fit box because I knew this was a project I would continue to use and modify over the years -- see Future Hopes in the section below -- and wanted the box to be easy to open up (to get to the wiring within!) without tearing apart messy glued-together sides and re-gluing them together.
Conceptual Design: I needed to incorporate the 2.8" by 2" screen and a place to put the RFID reader, and I wanted to include LEDs and buttons for scrolling through different menus.
Iterations:
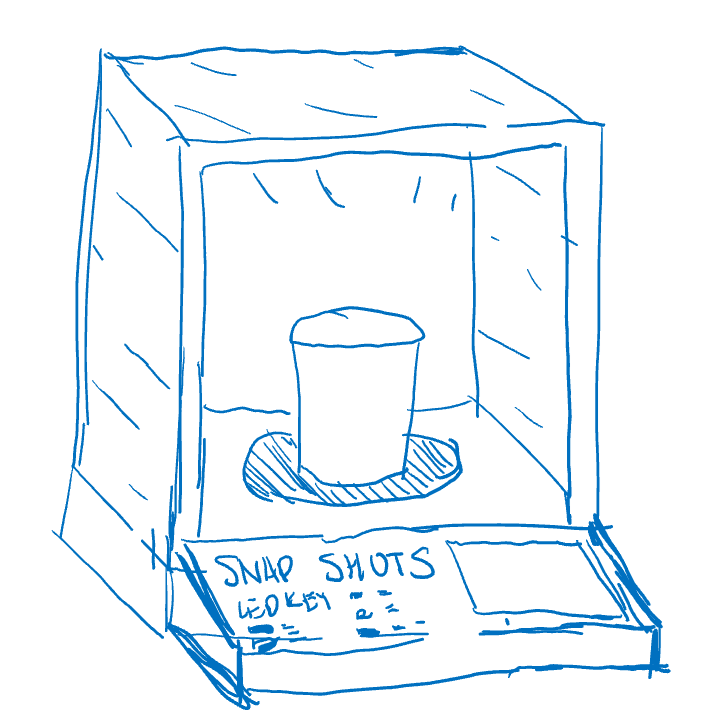
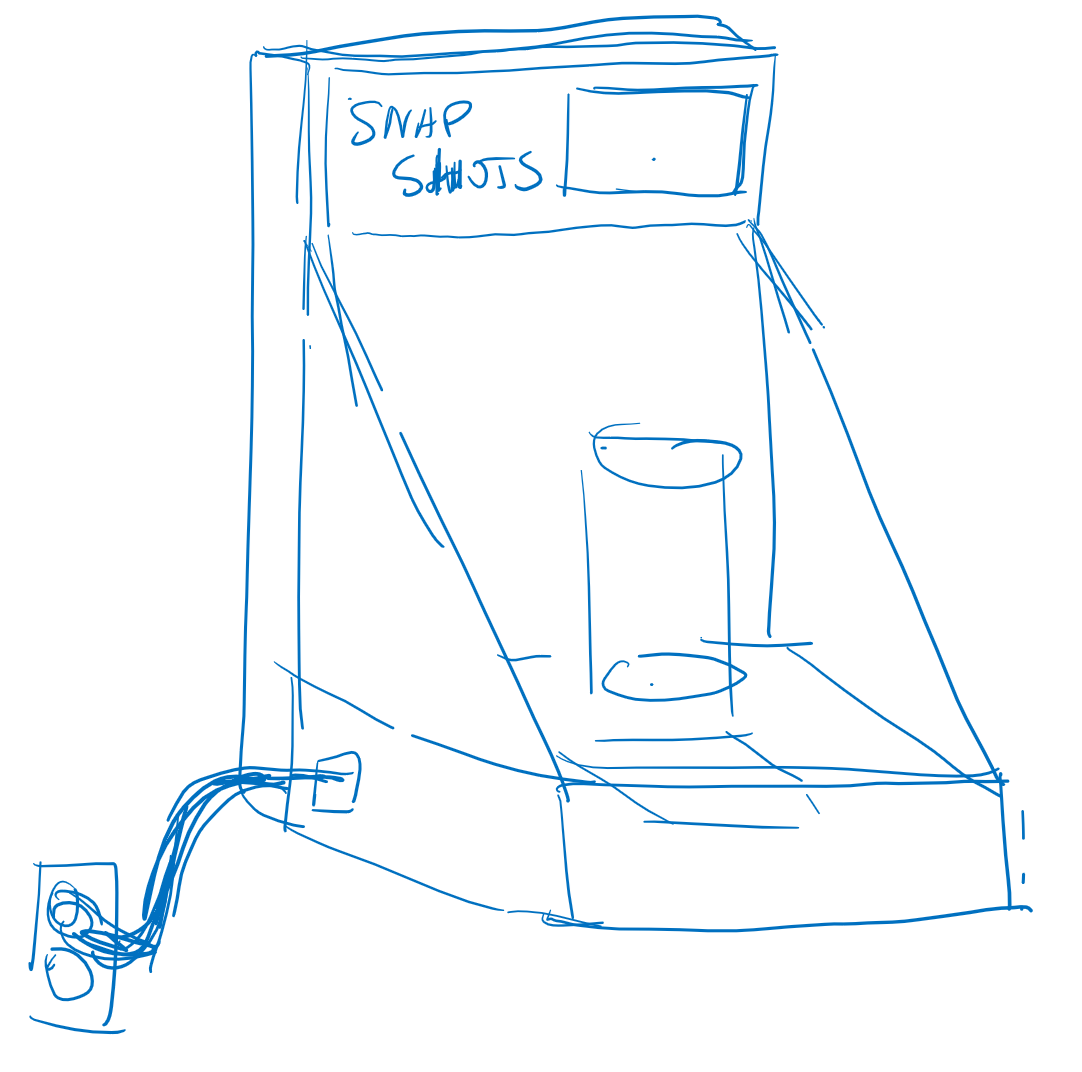
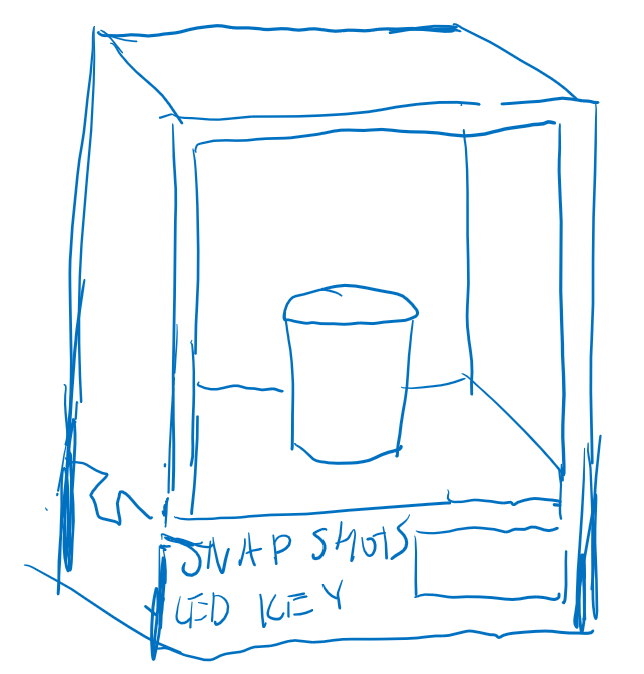
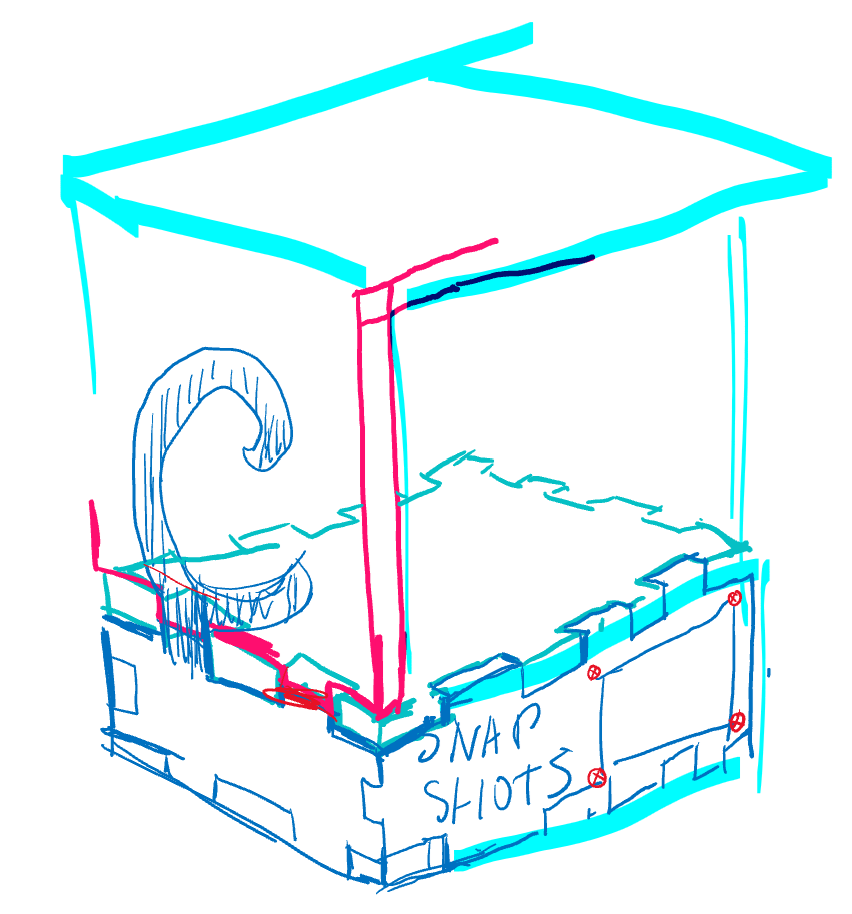
After this dreaded 4th design which would have been impossible to press fit in hindsight -- Thank you Nathan, for letting me know -- it hit me: there doesn't need to be a box on top of the shotglass. There only needed to be a box under the shotglass that also made space for a screen.
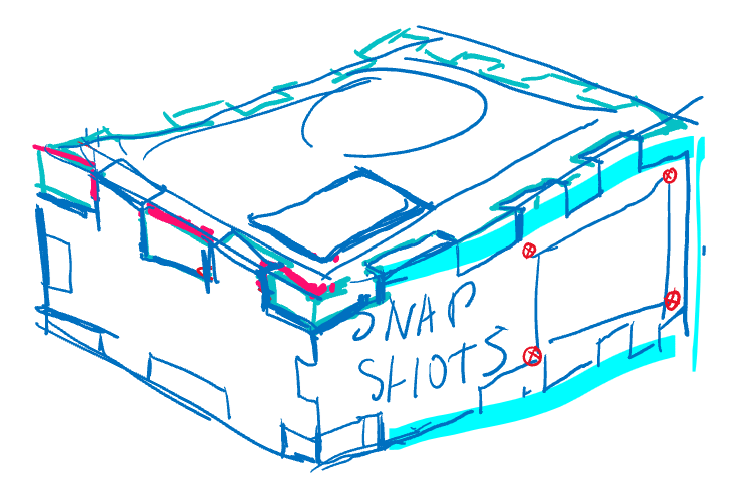
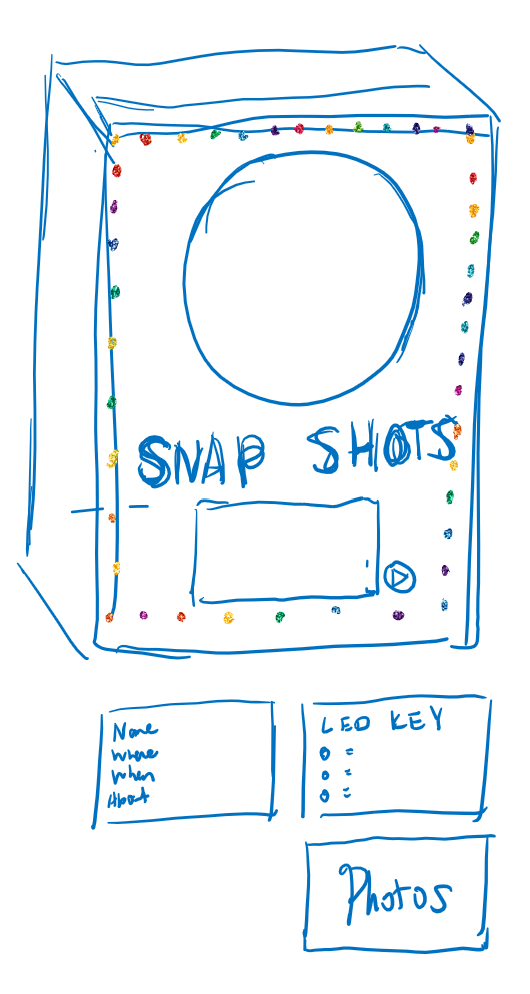
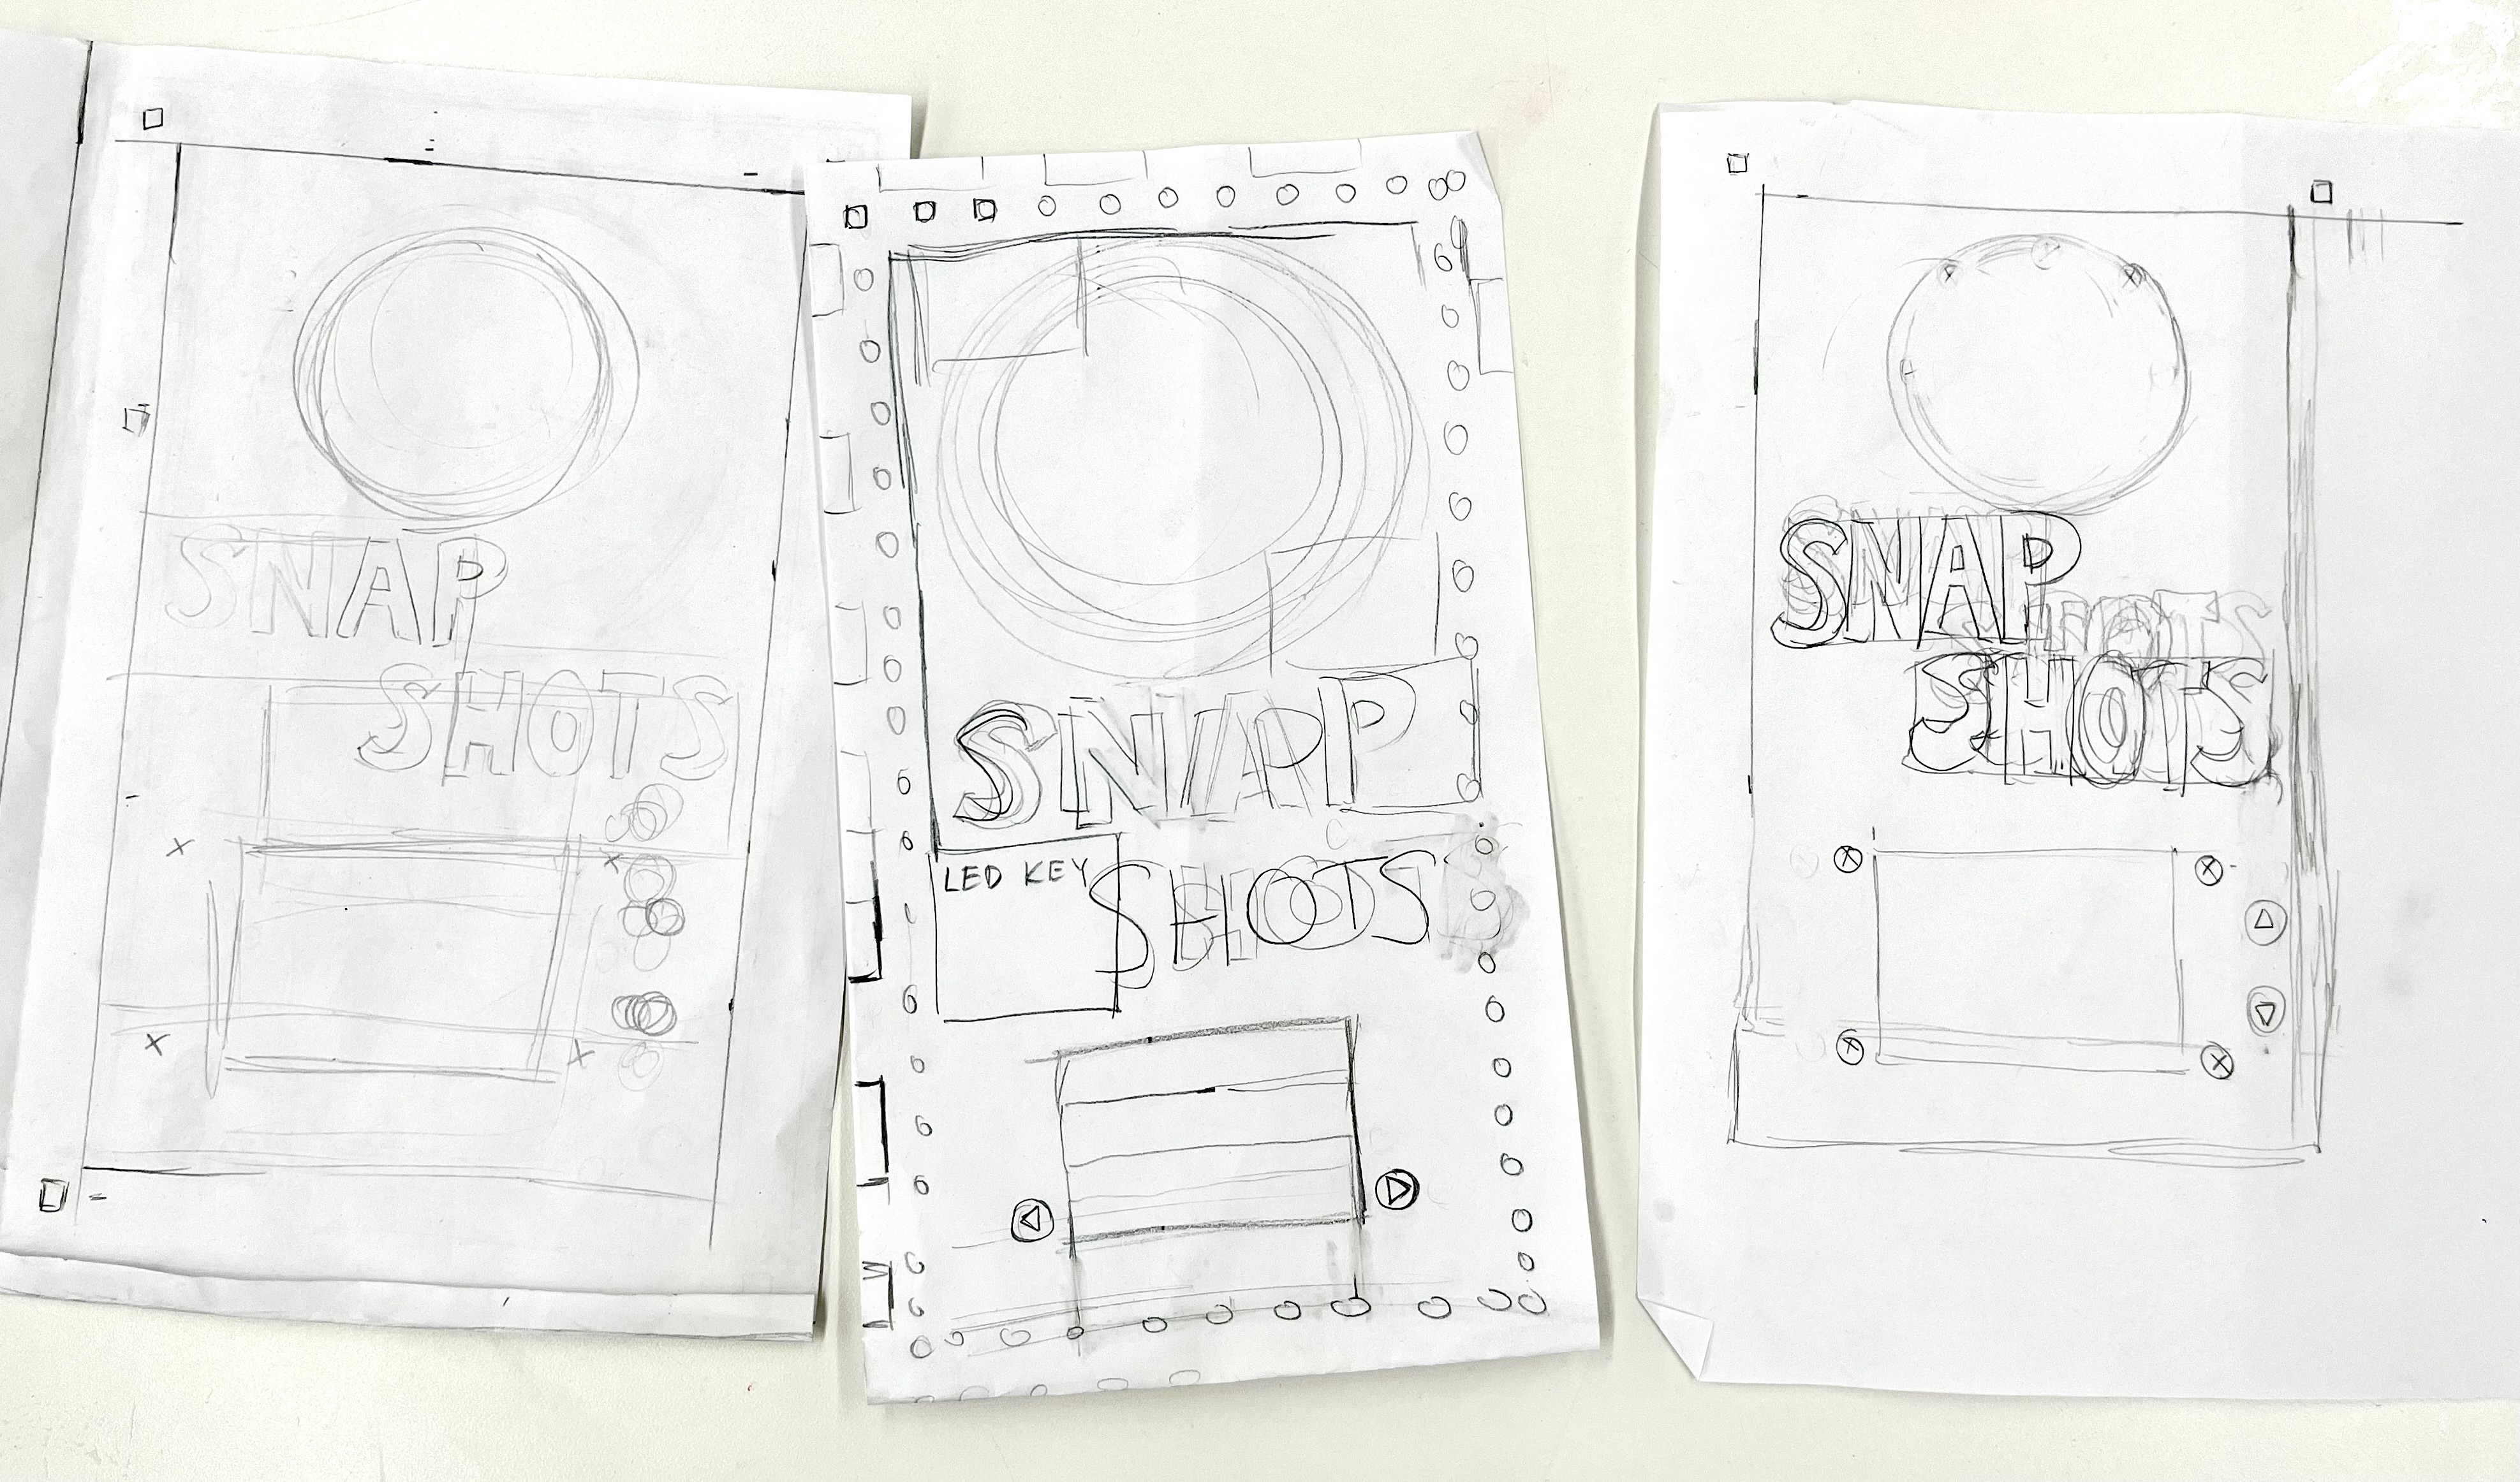
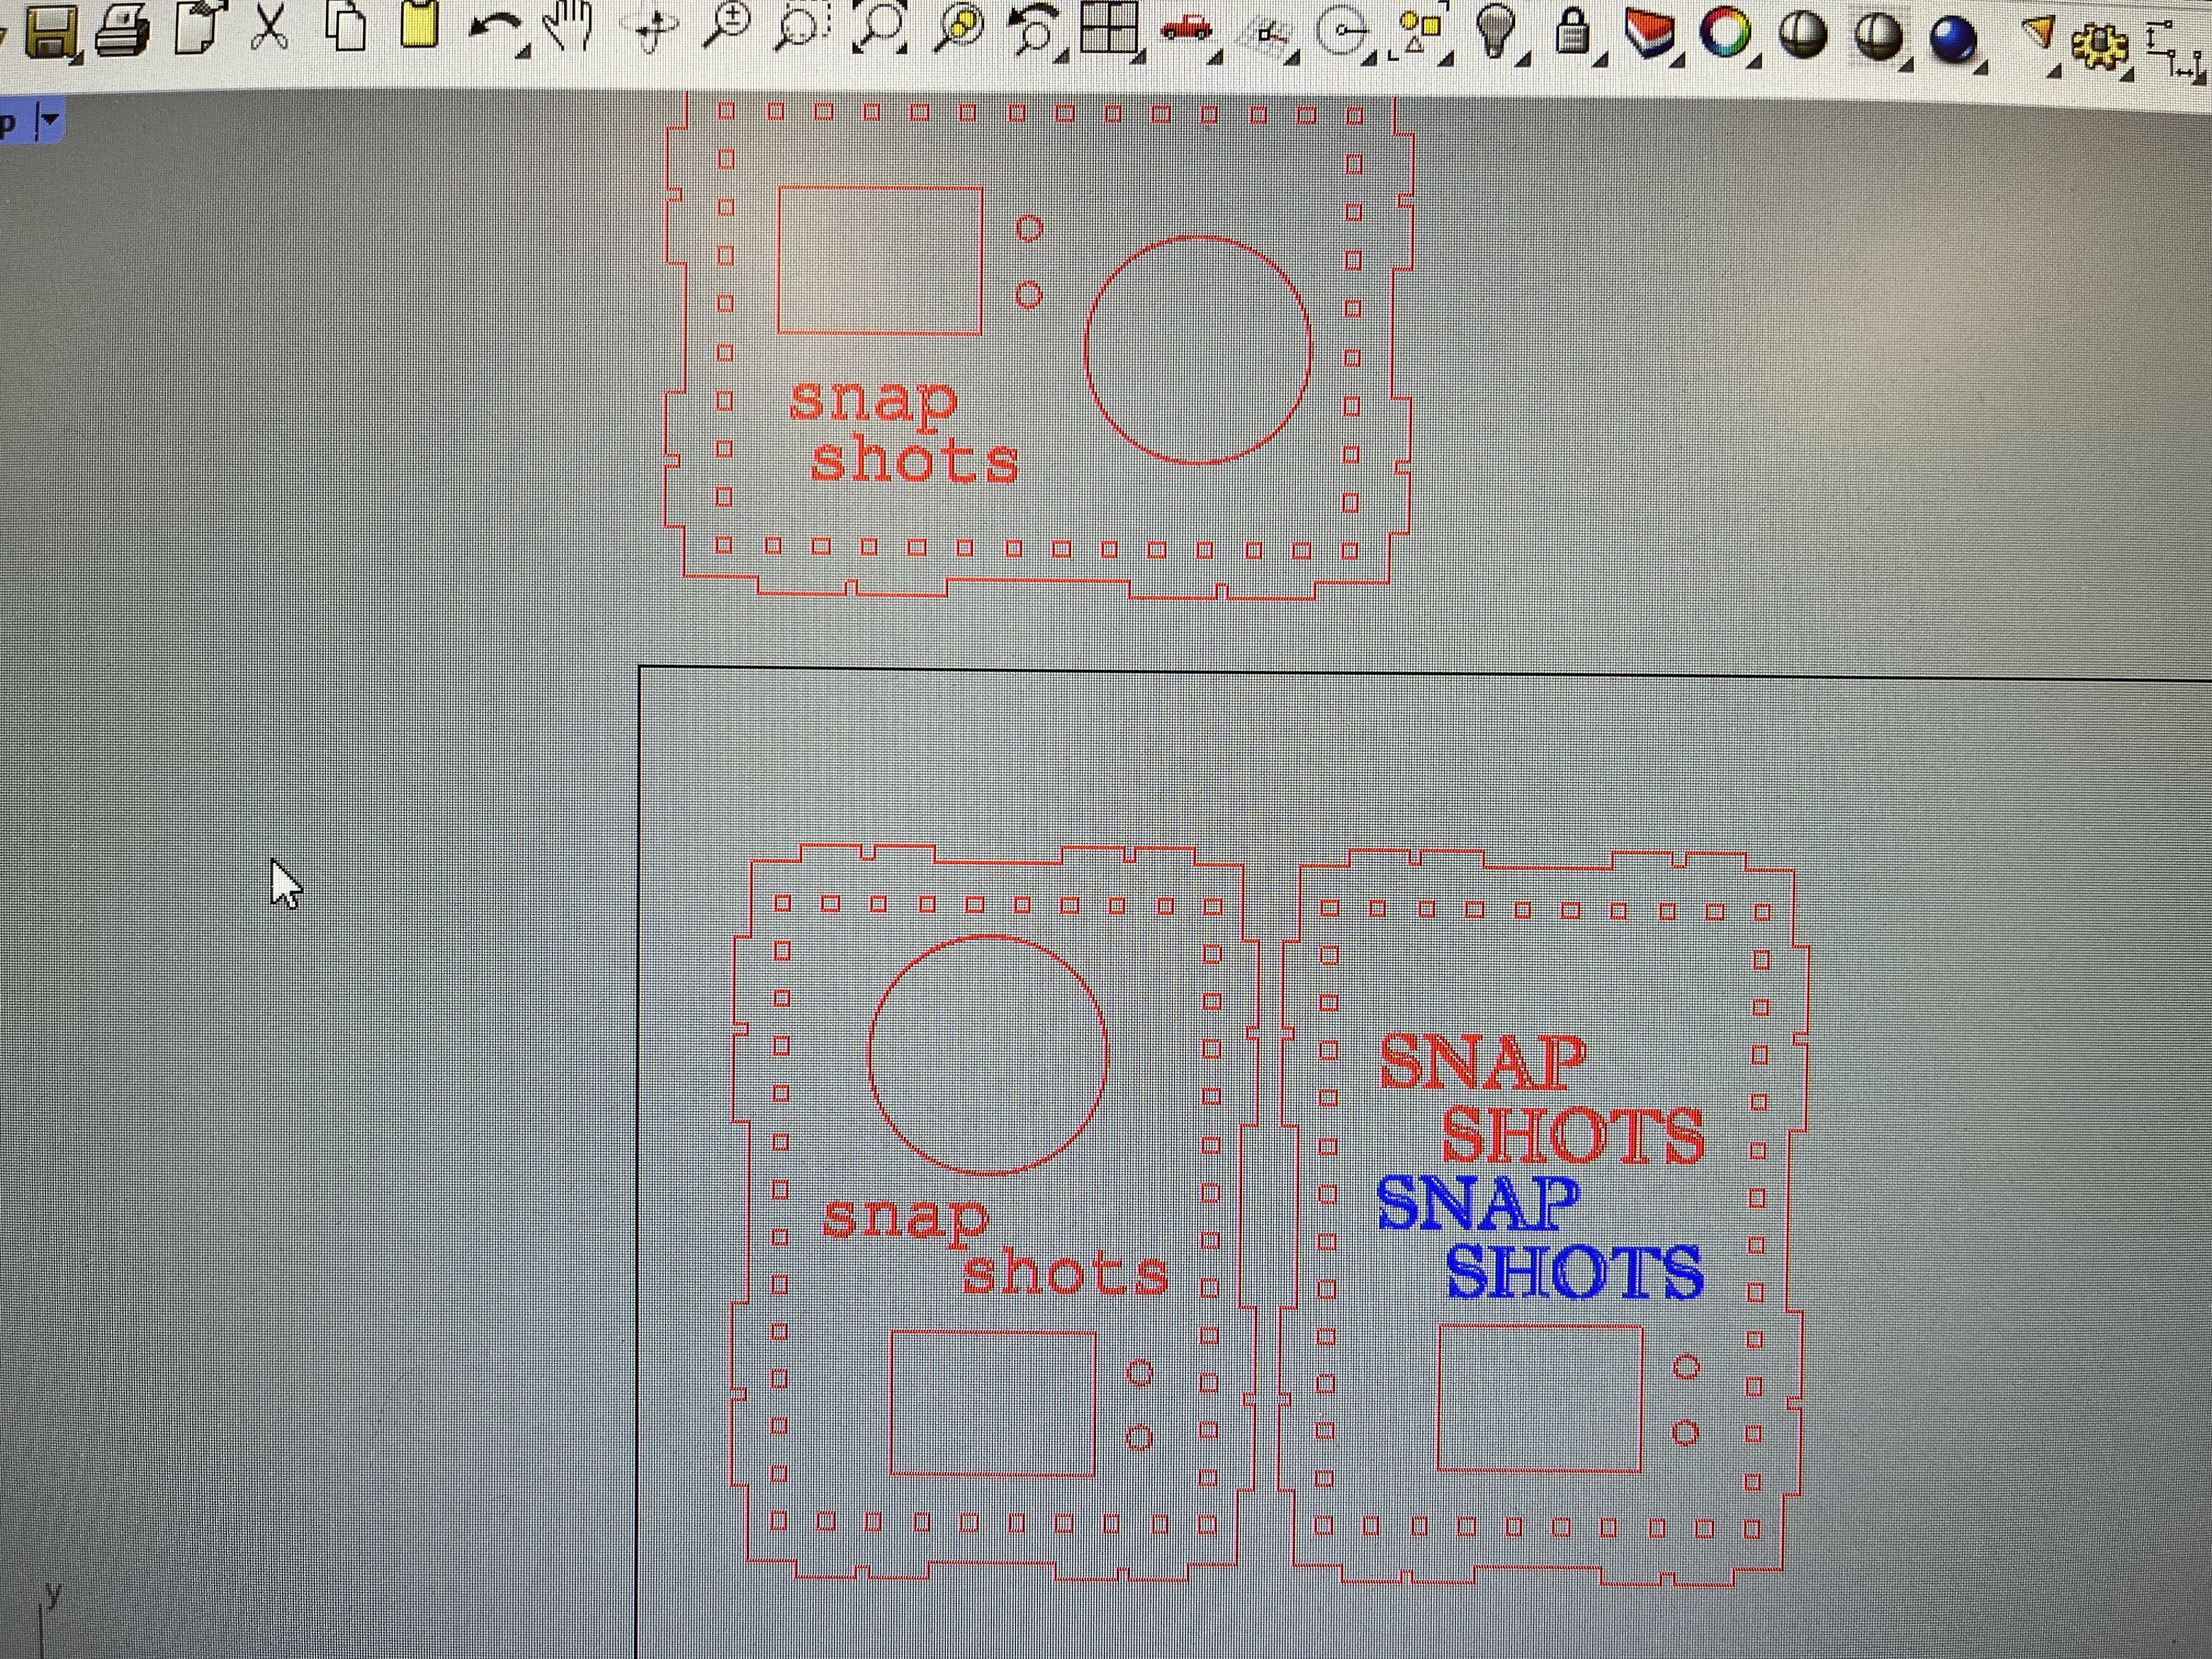
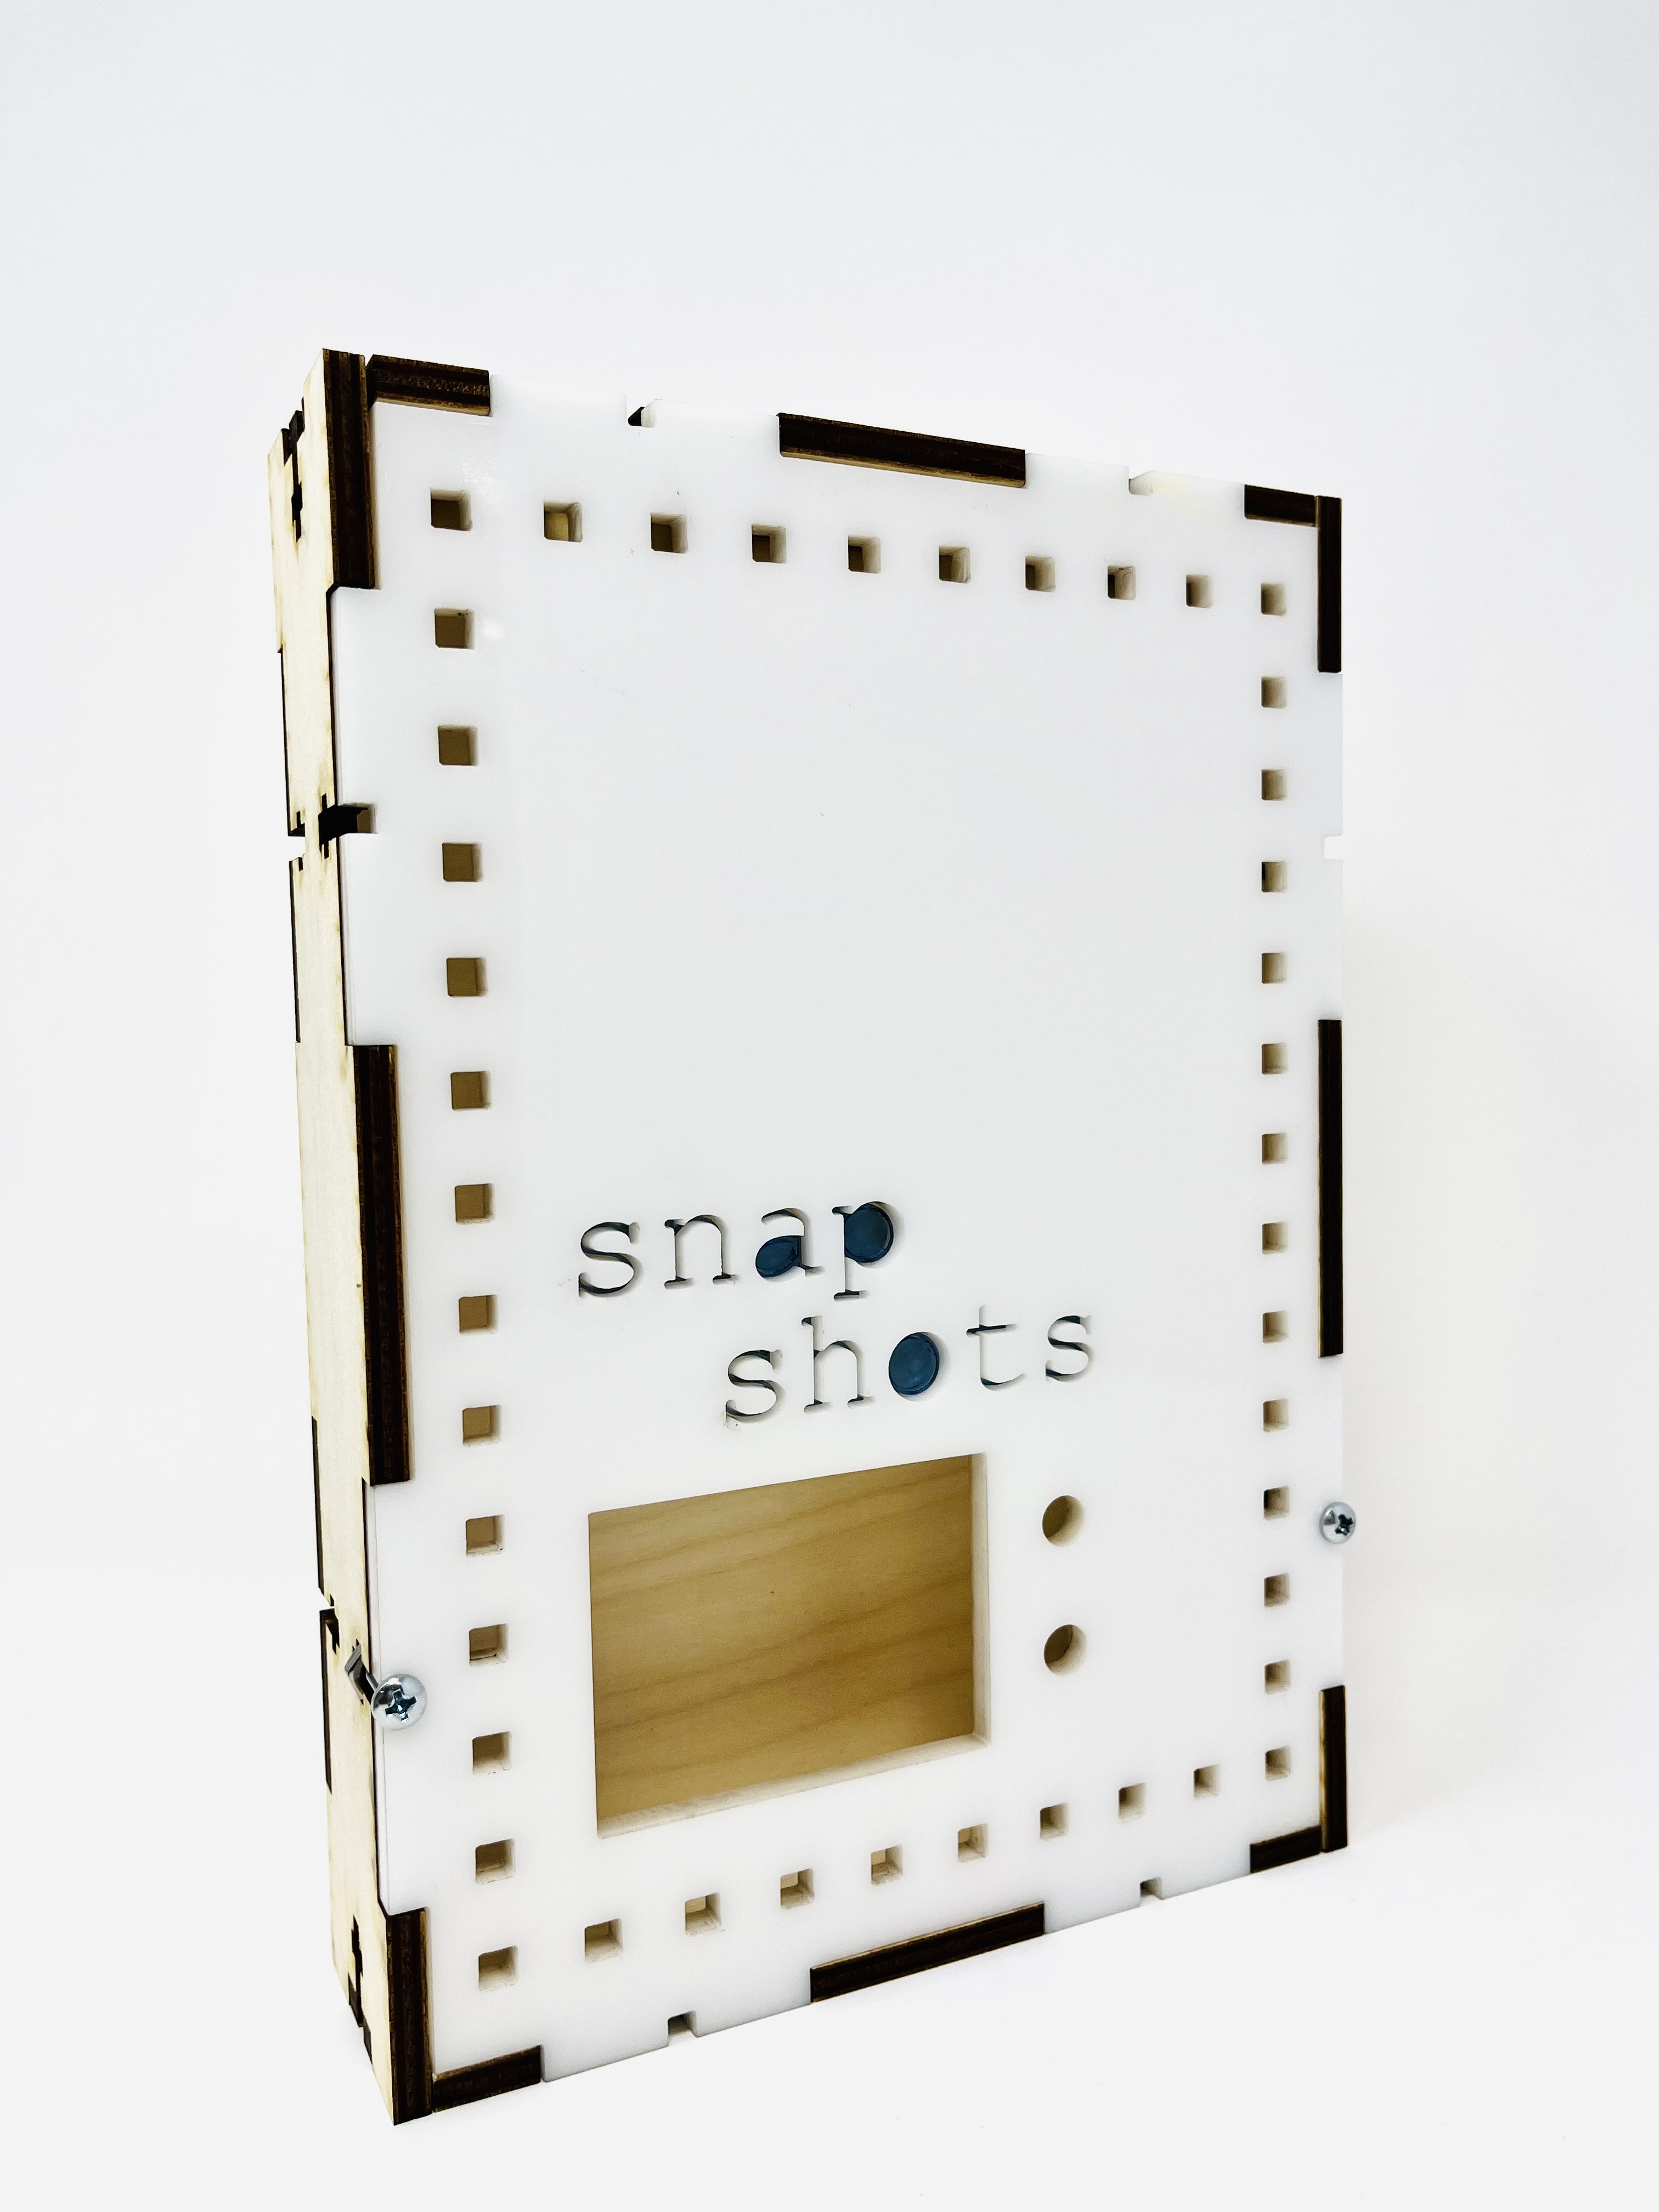
Fusion Design: I started with a DXF template from Makercase.com that created a press-fit 10" by 2" by 7.125" box with T-slots for #8 3/4inch screws and nuts. From there I added a rectangle cutout for the screen, small circle cutouts for the buttons, and many square cutouts for the NeoPixel LED strip. Using cardboard, I was able to find the right size for each cutout and how far apart the buttons and LED strips should be.
I was able to create a well-fit box from cardboard/matboard, and for the Project Fair, I used this clear acrylic face with cardboard sides and back:
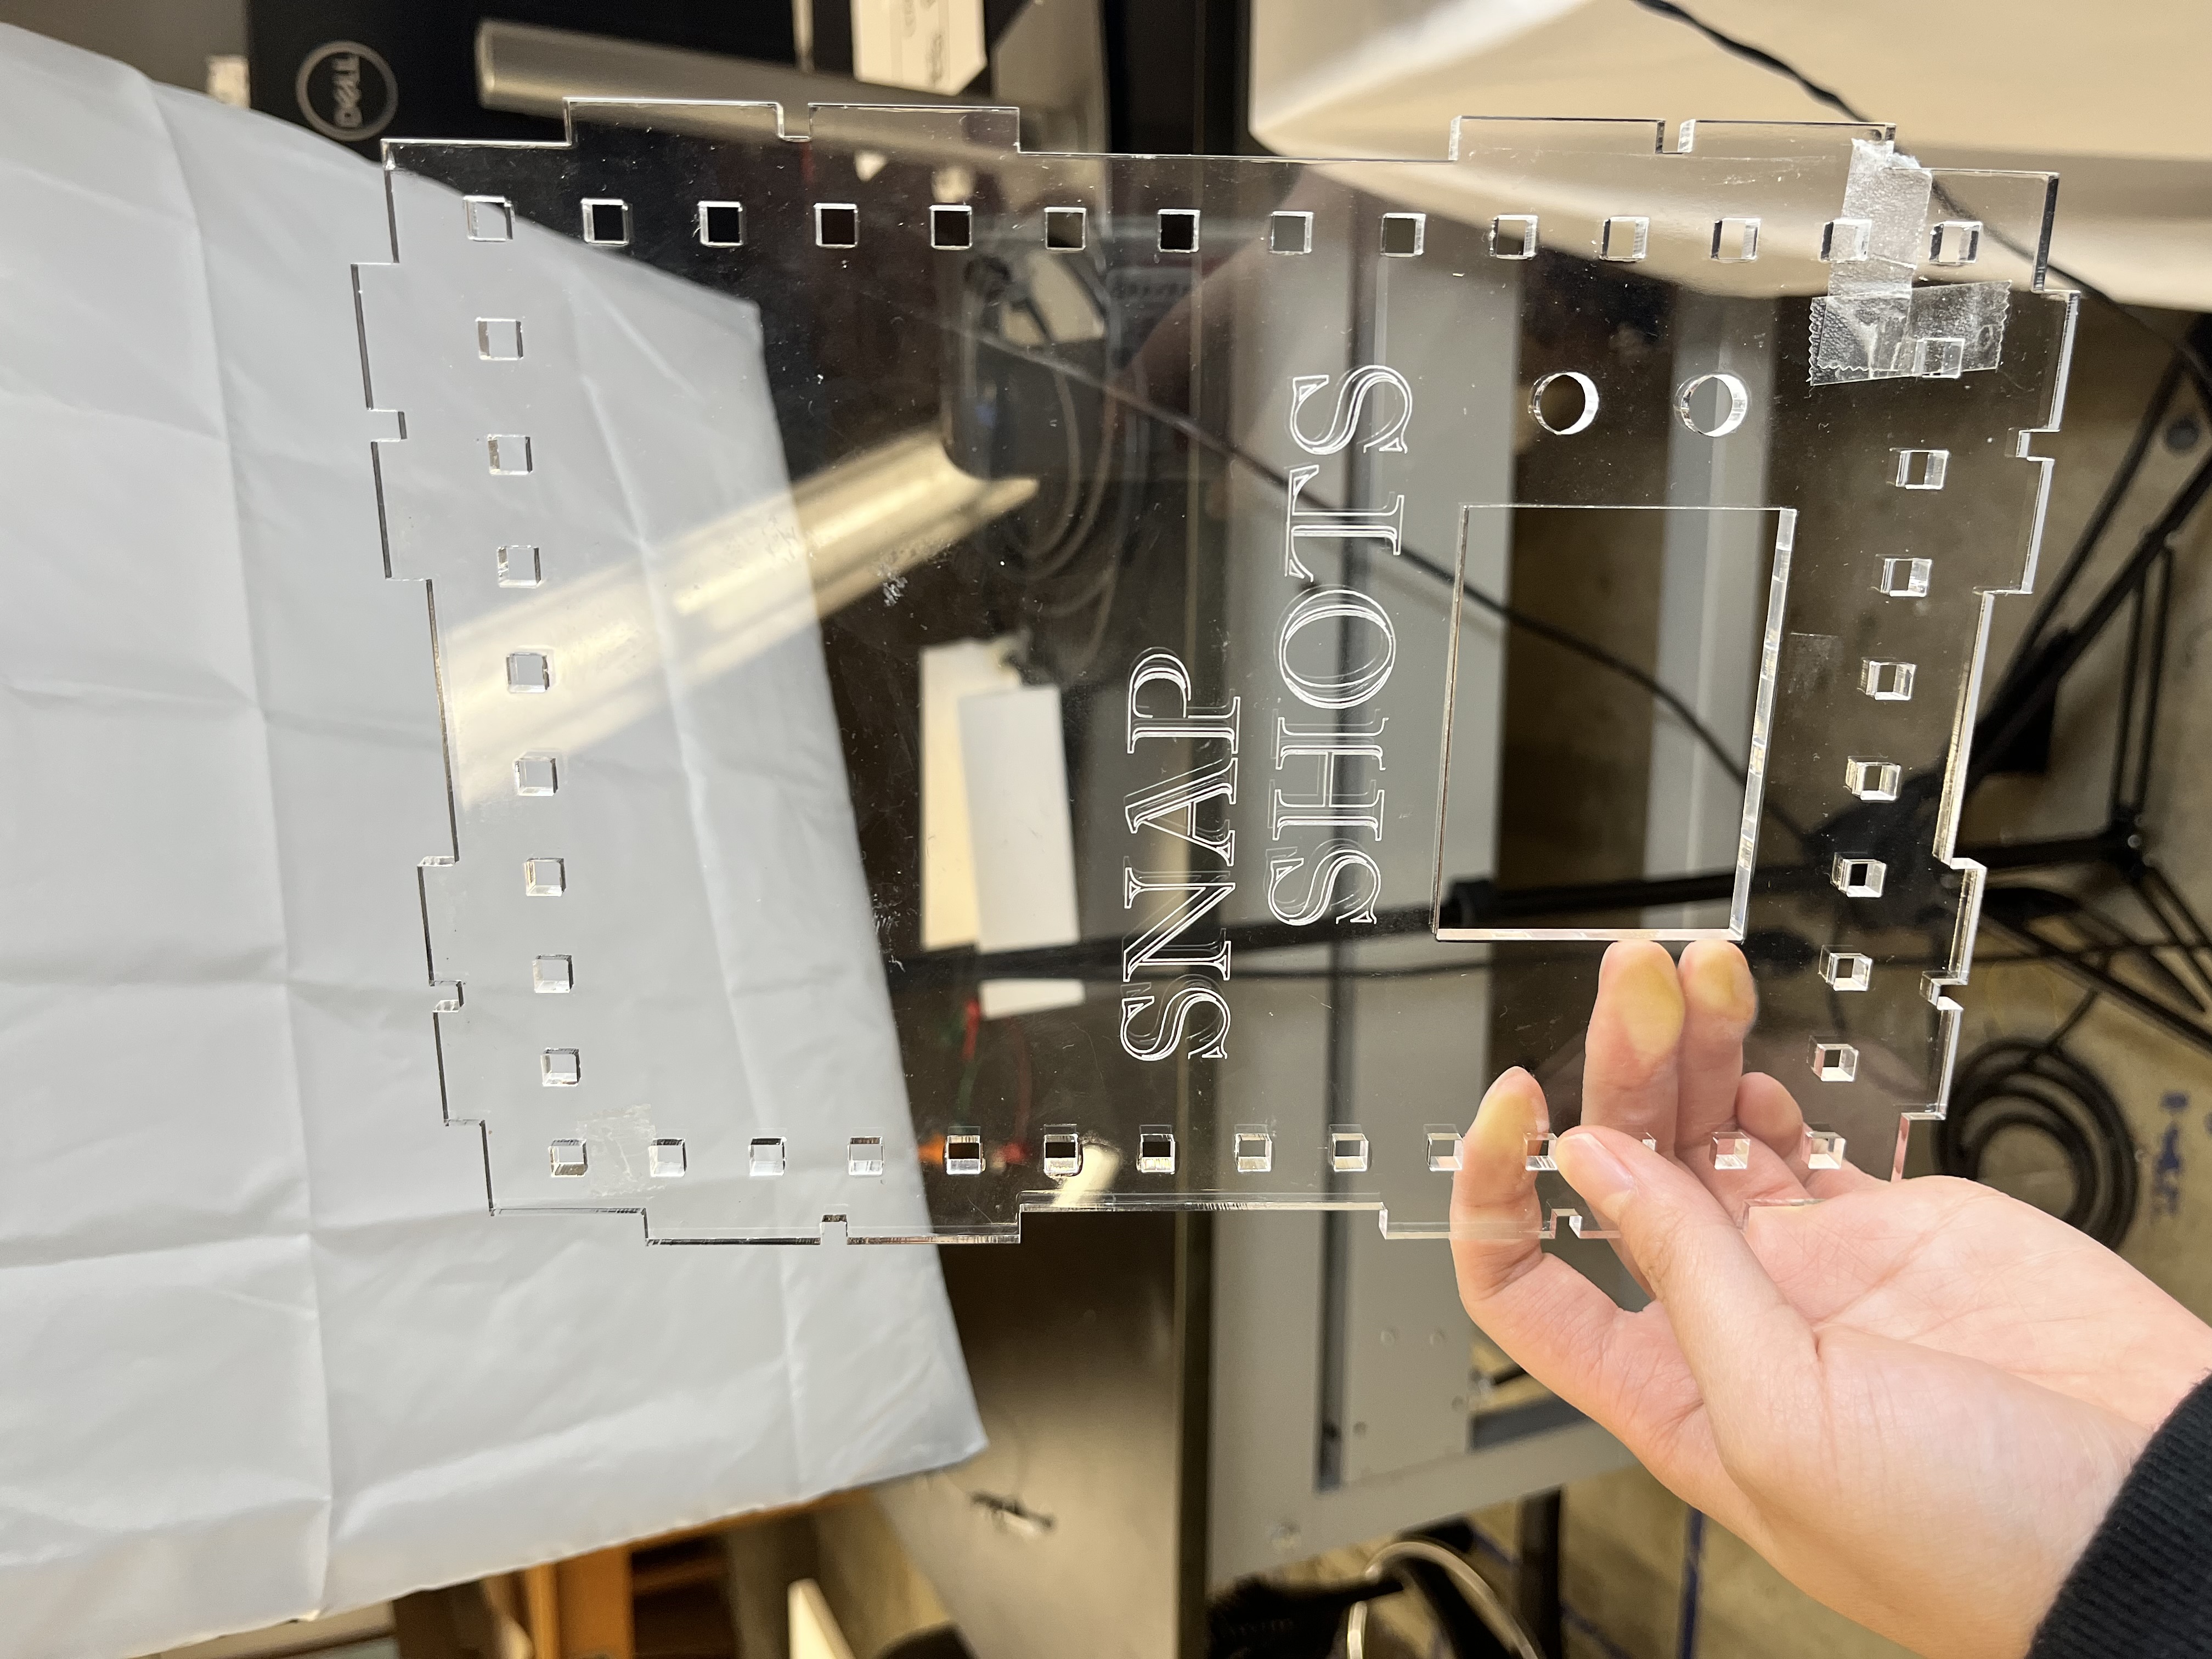
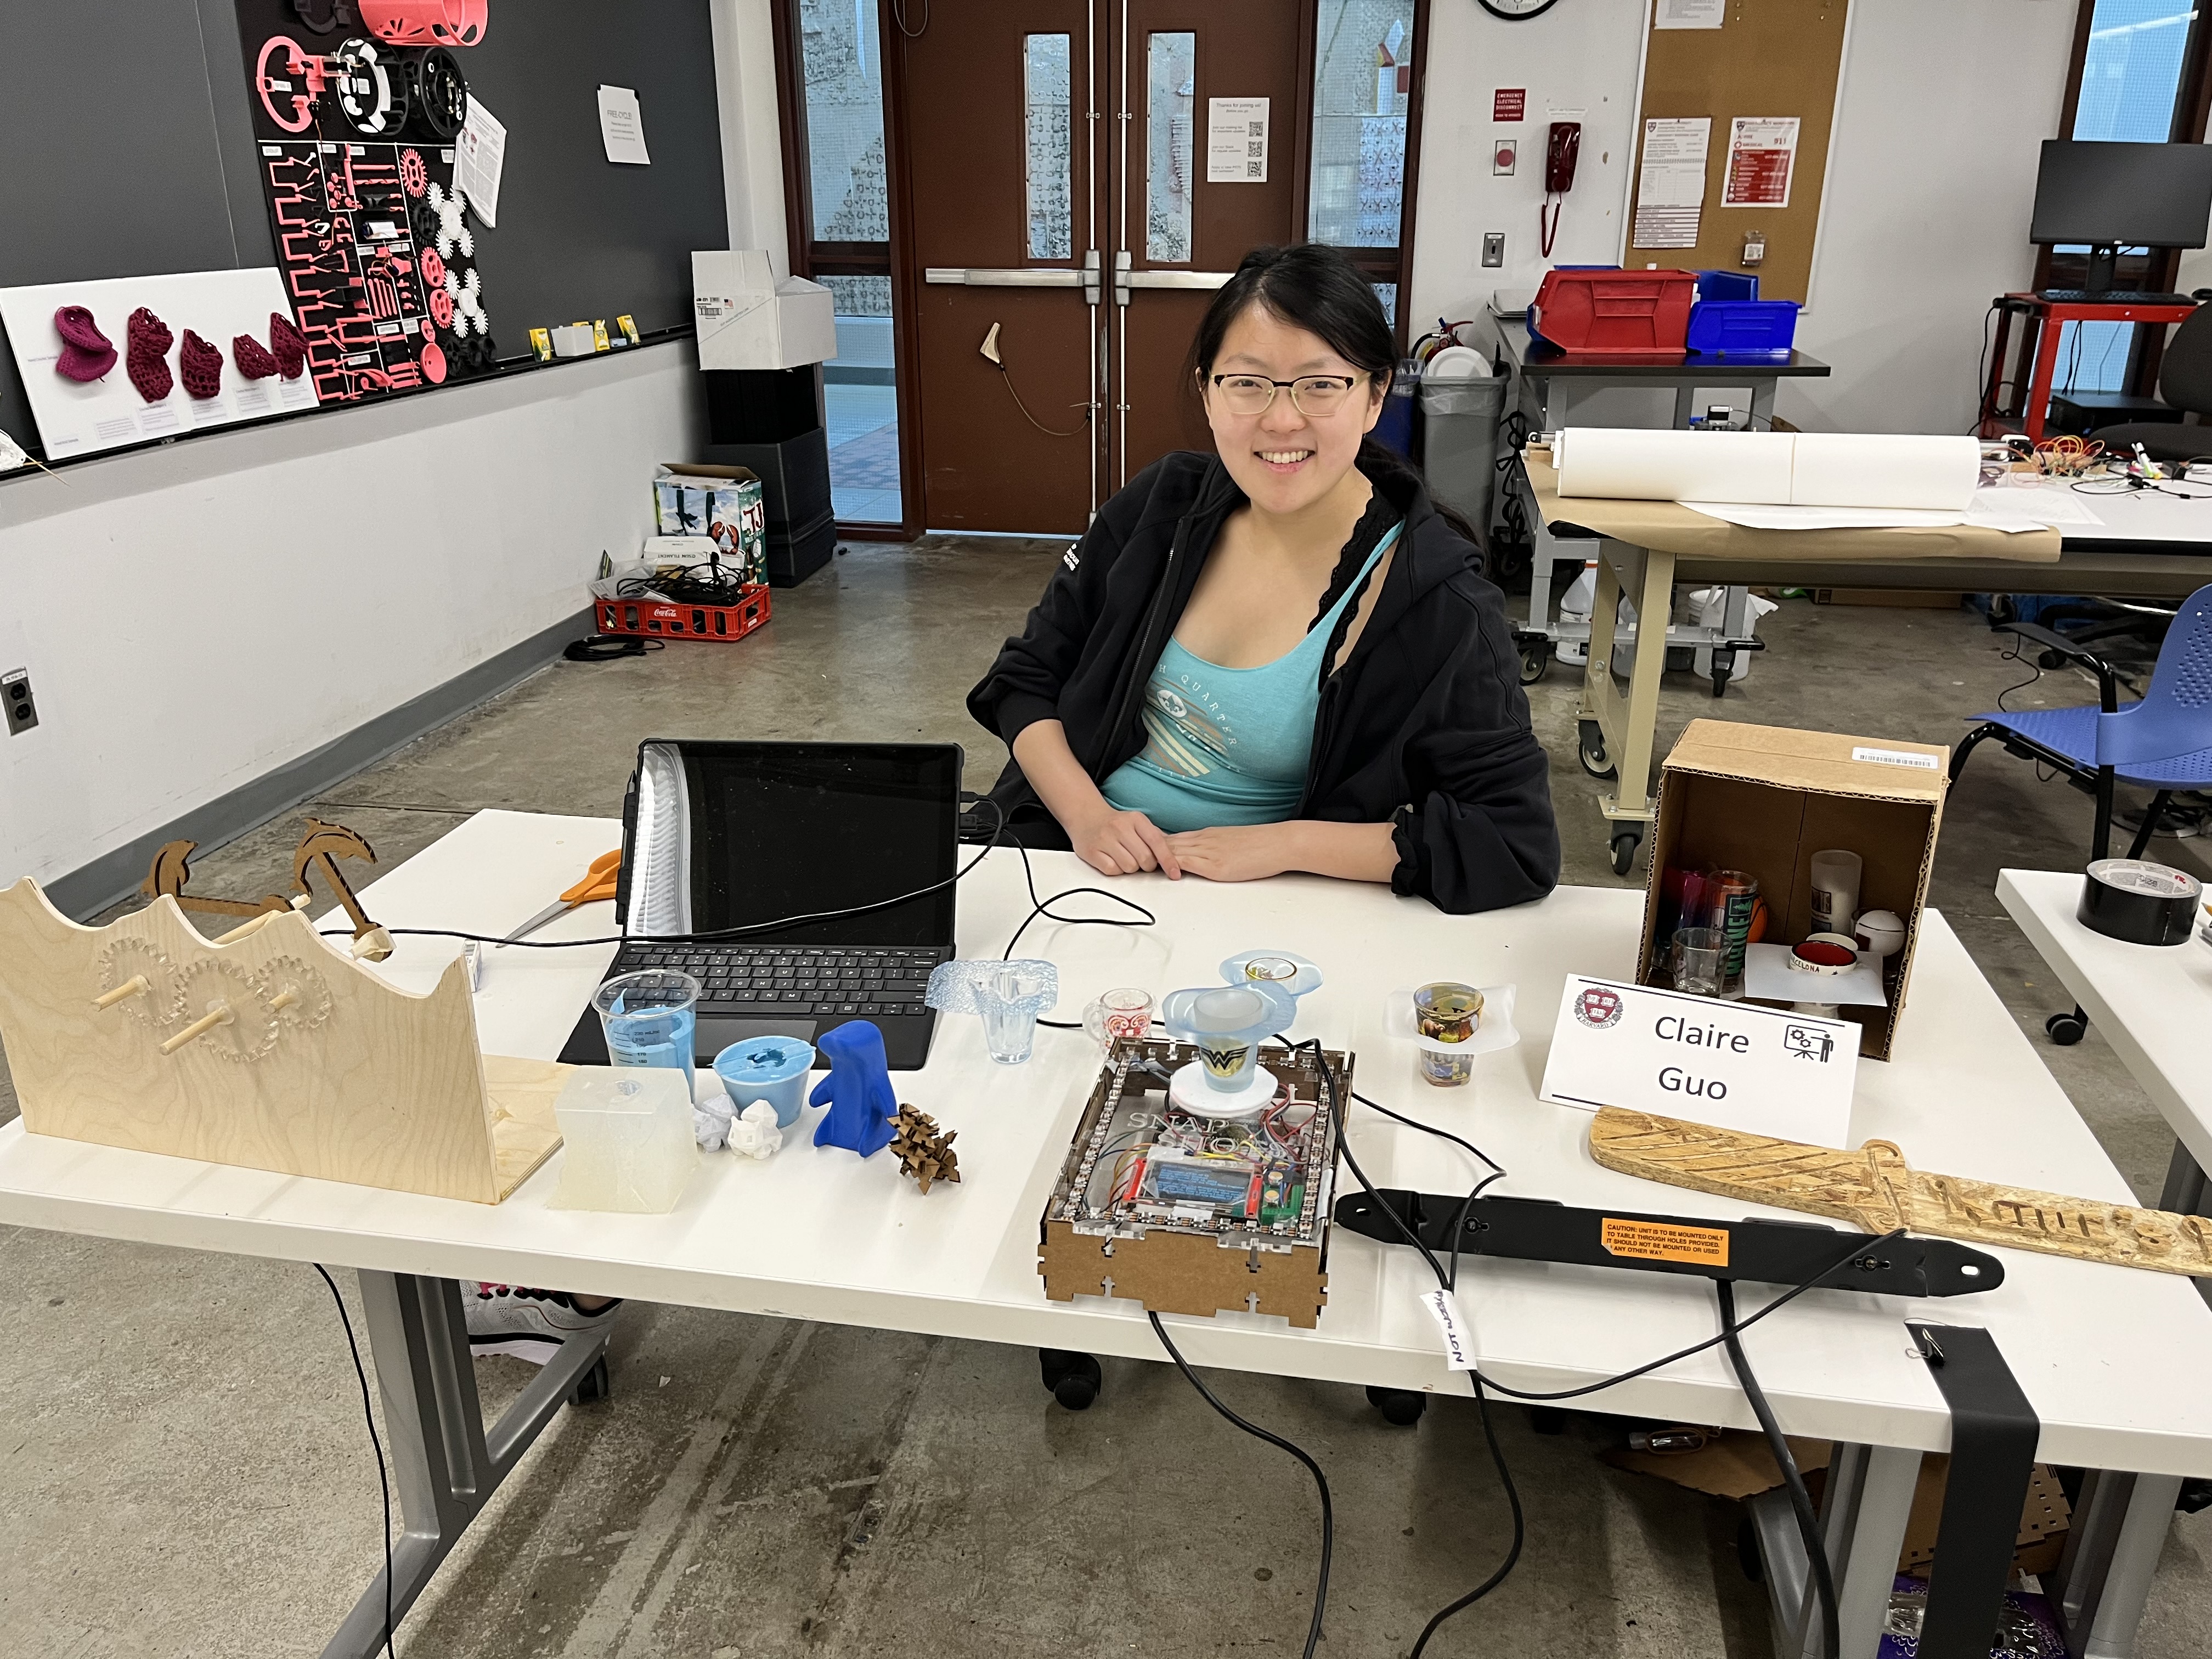
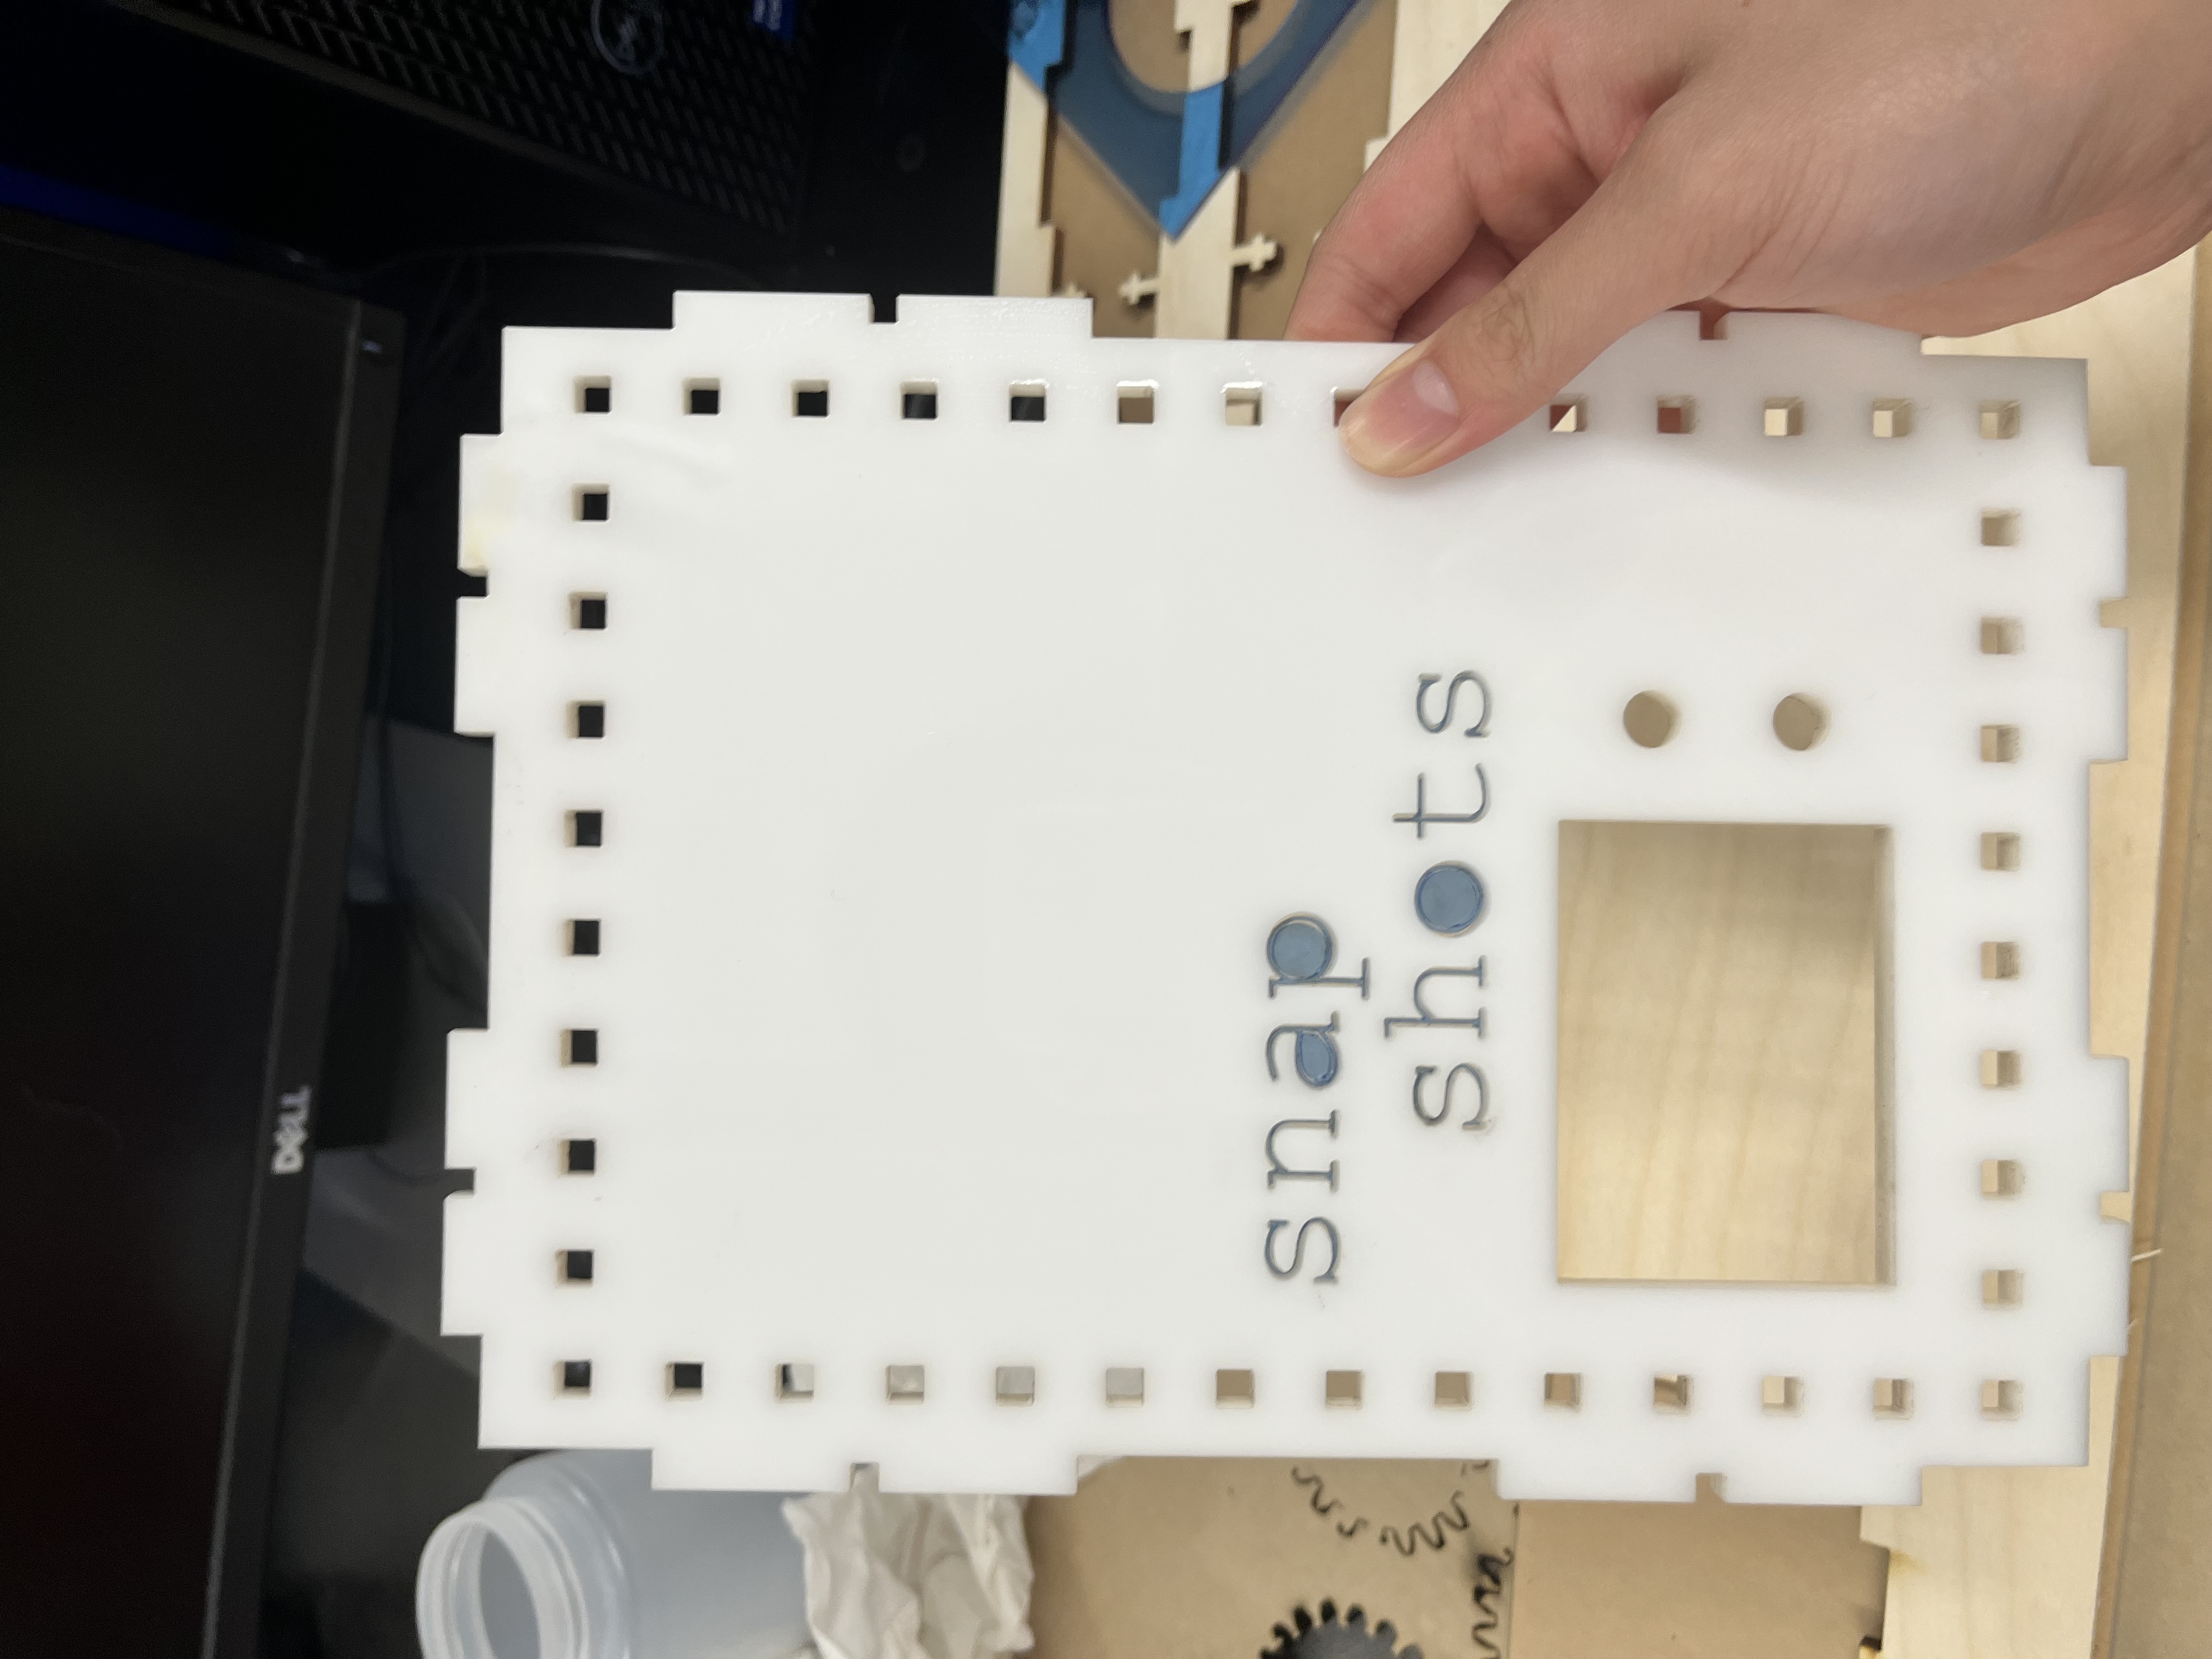
But I didn't like how you could see the wiring inside the box and I wanted something long-lasting (i.e. not cardboard). I decided on a white acrylic face with plywood sidings and back.
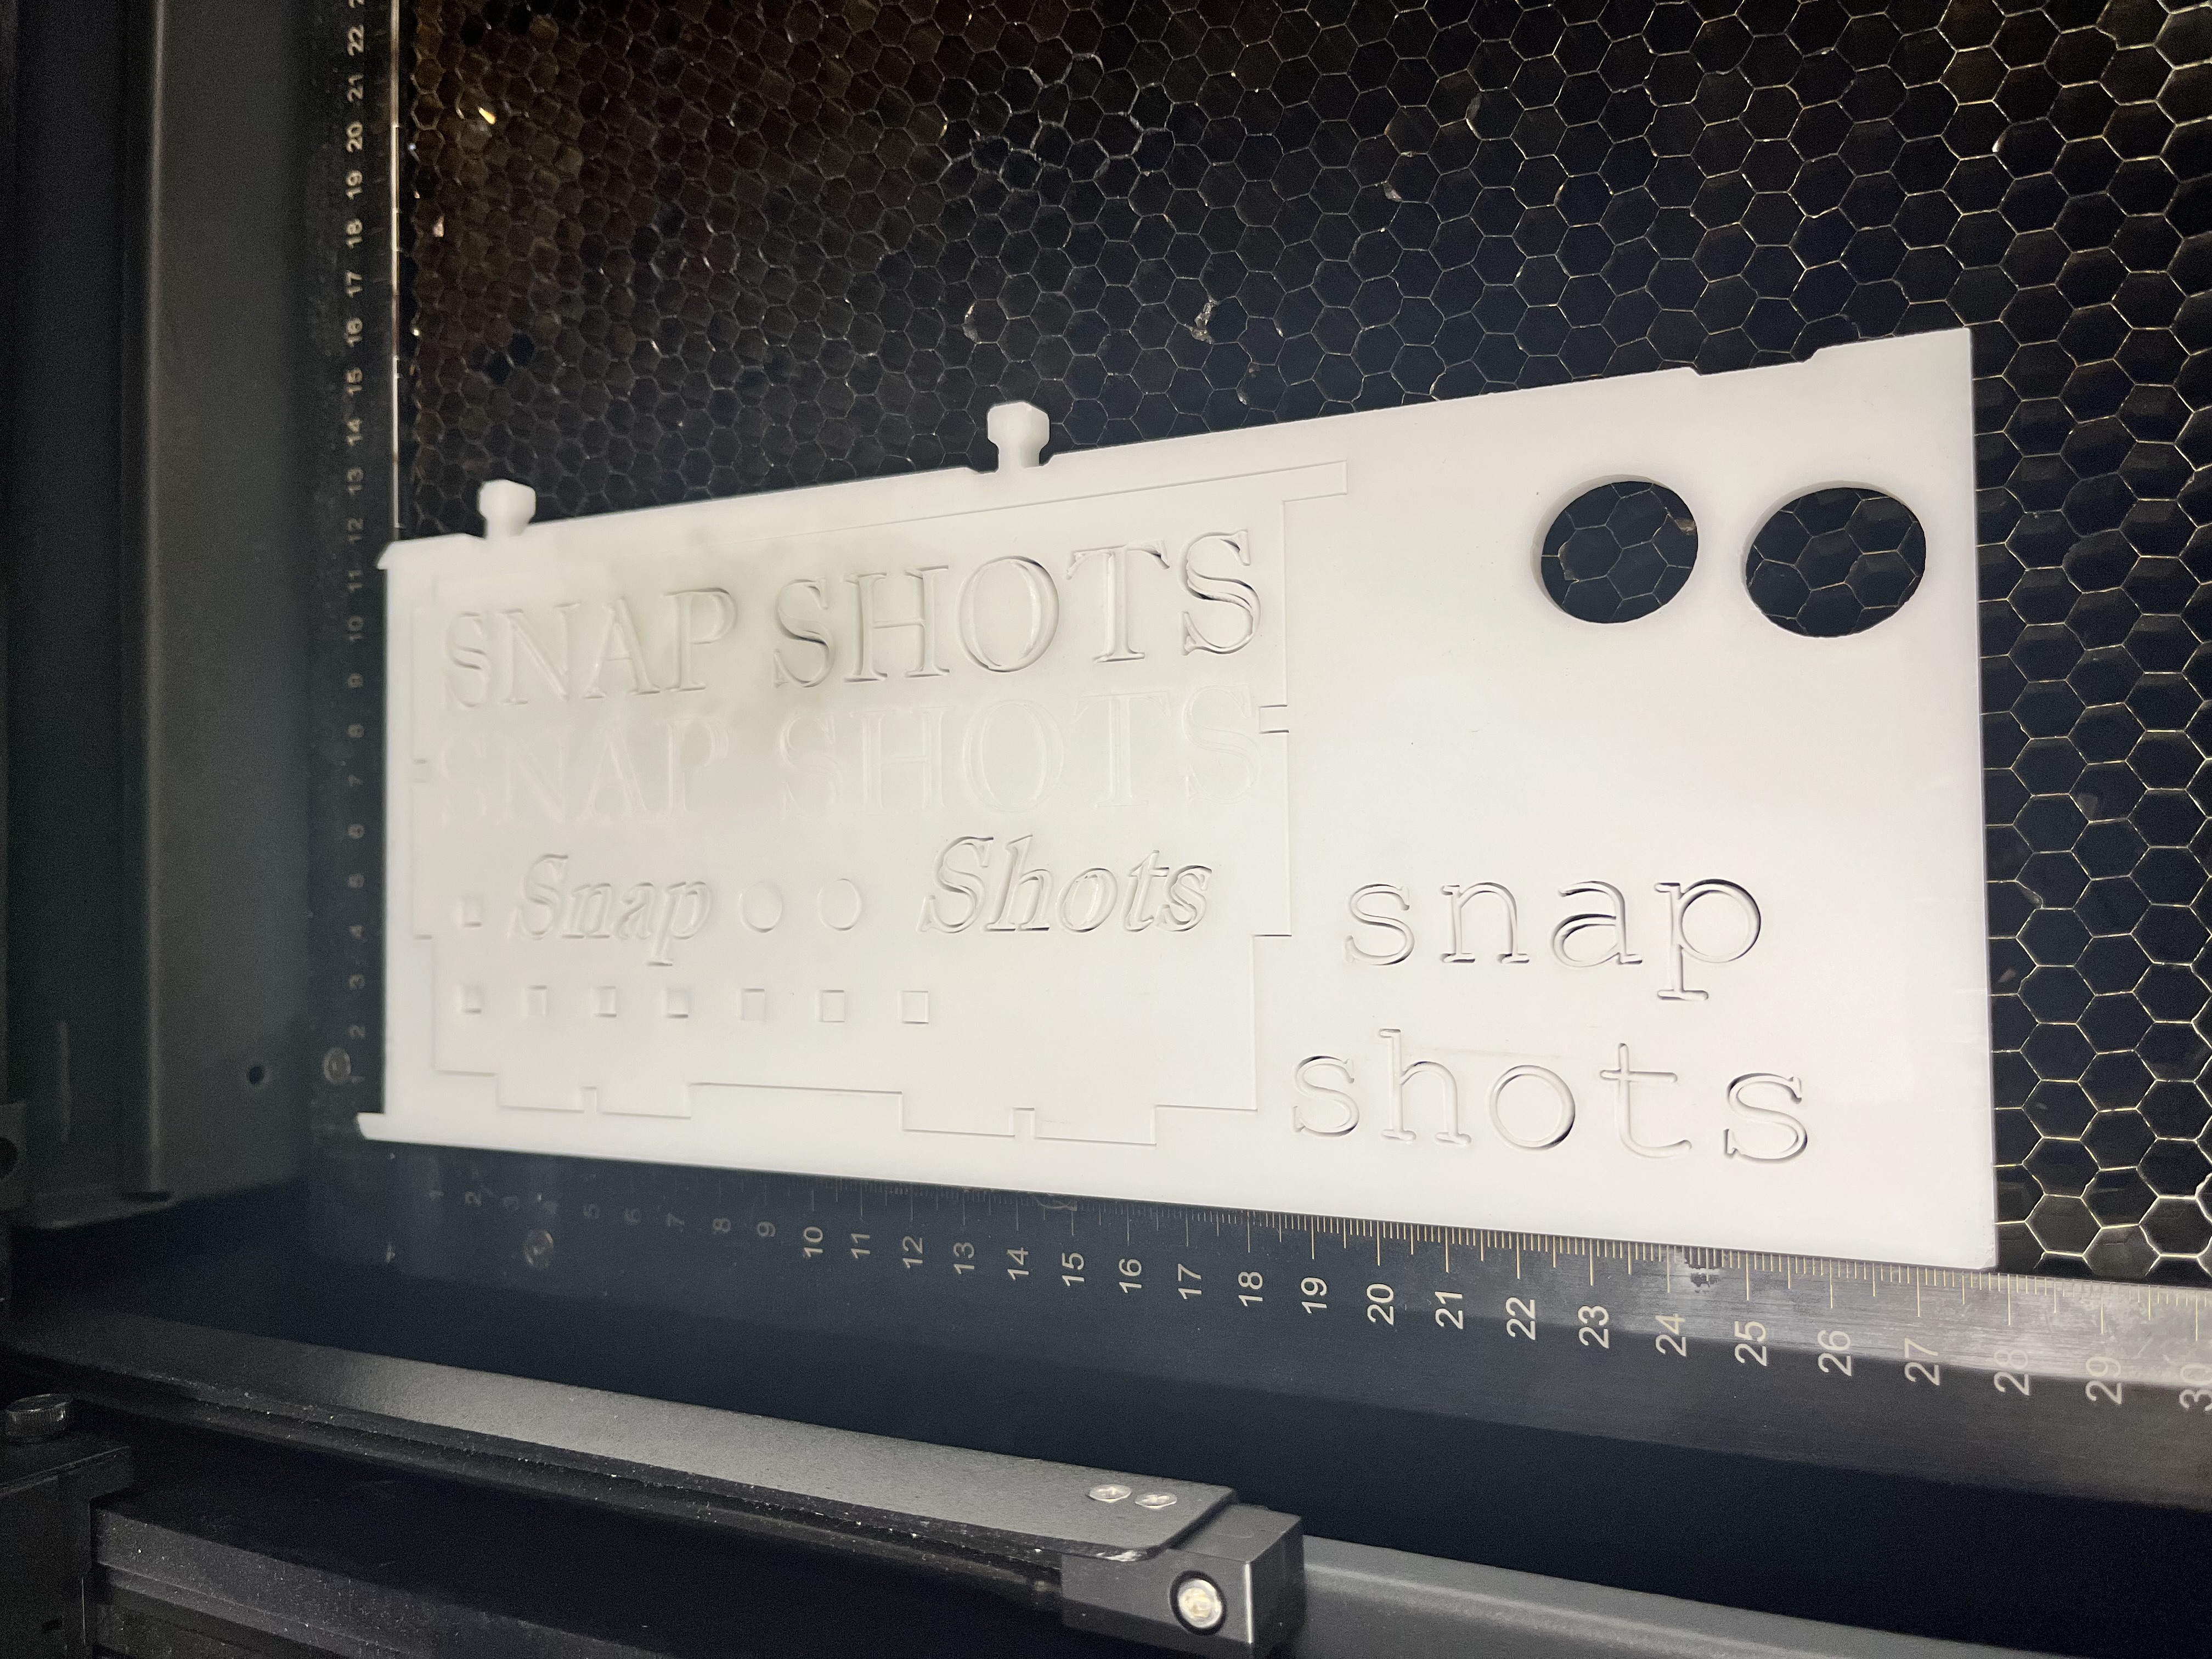
I experimented with getting the kerf right with the 0.236" acrylic and plywood sheets, far less forgiving materials compared to cardboard. To find fit, I printed the smallest part of the press-fit box (the back where the cords come out) first form the original DXF file (zero kerf) and found that it didn't fit the acrylic, but just barely. I then adjusted each "male" and "female" part of the press-fit on that piece to have 0.04 inches more "give", then 0.02 inches more flexible, then finally 0.01 inches more flexible, which gave me the perfect press-fit:
Perfect! (For future press-fitters, add 0.005" of "give" to either the "male" and/or "female" part of every connection to get the perfect press-fit for 0.236" acrylic and plywood!)
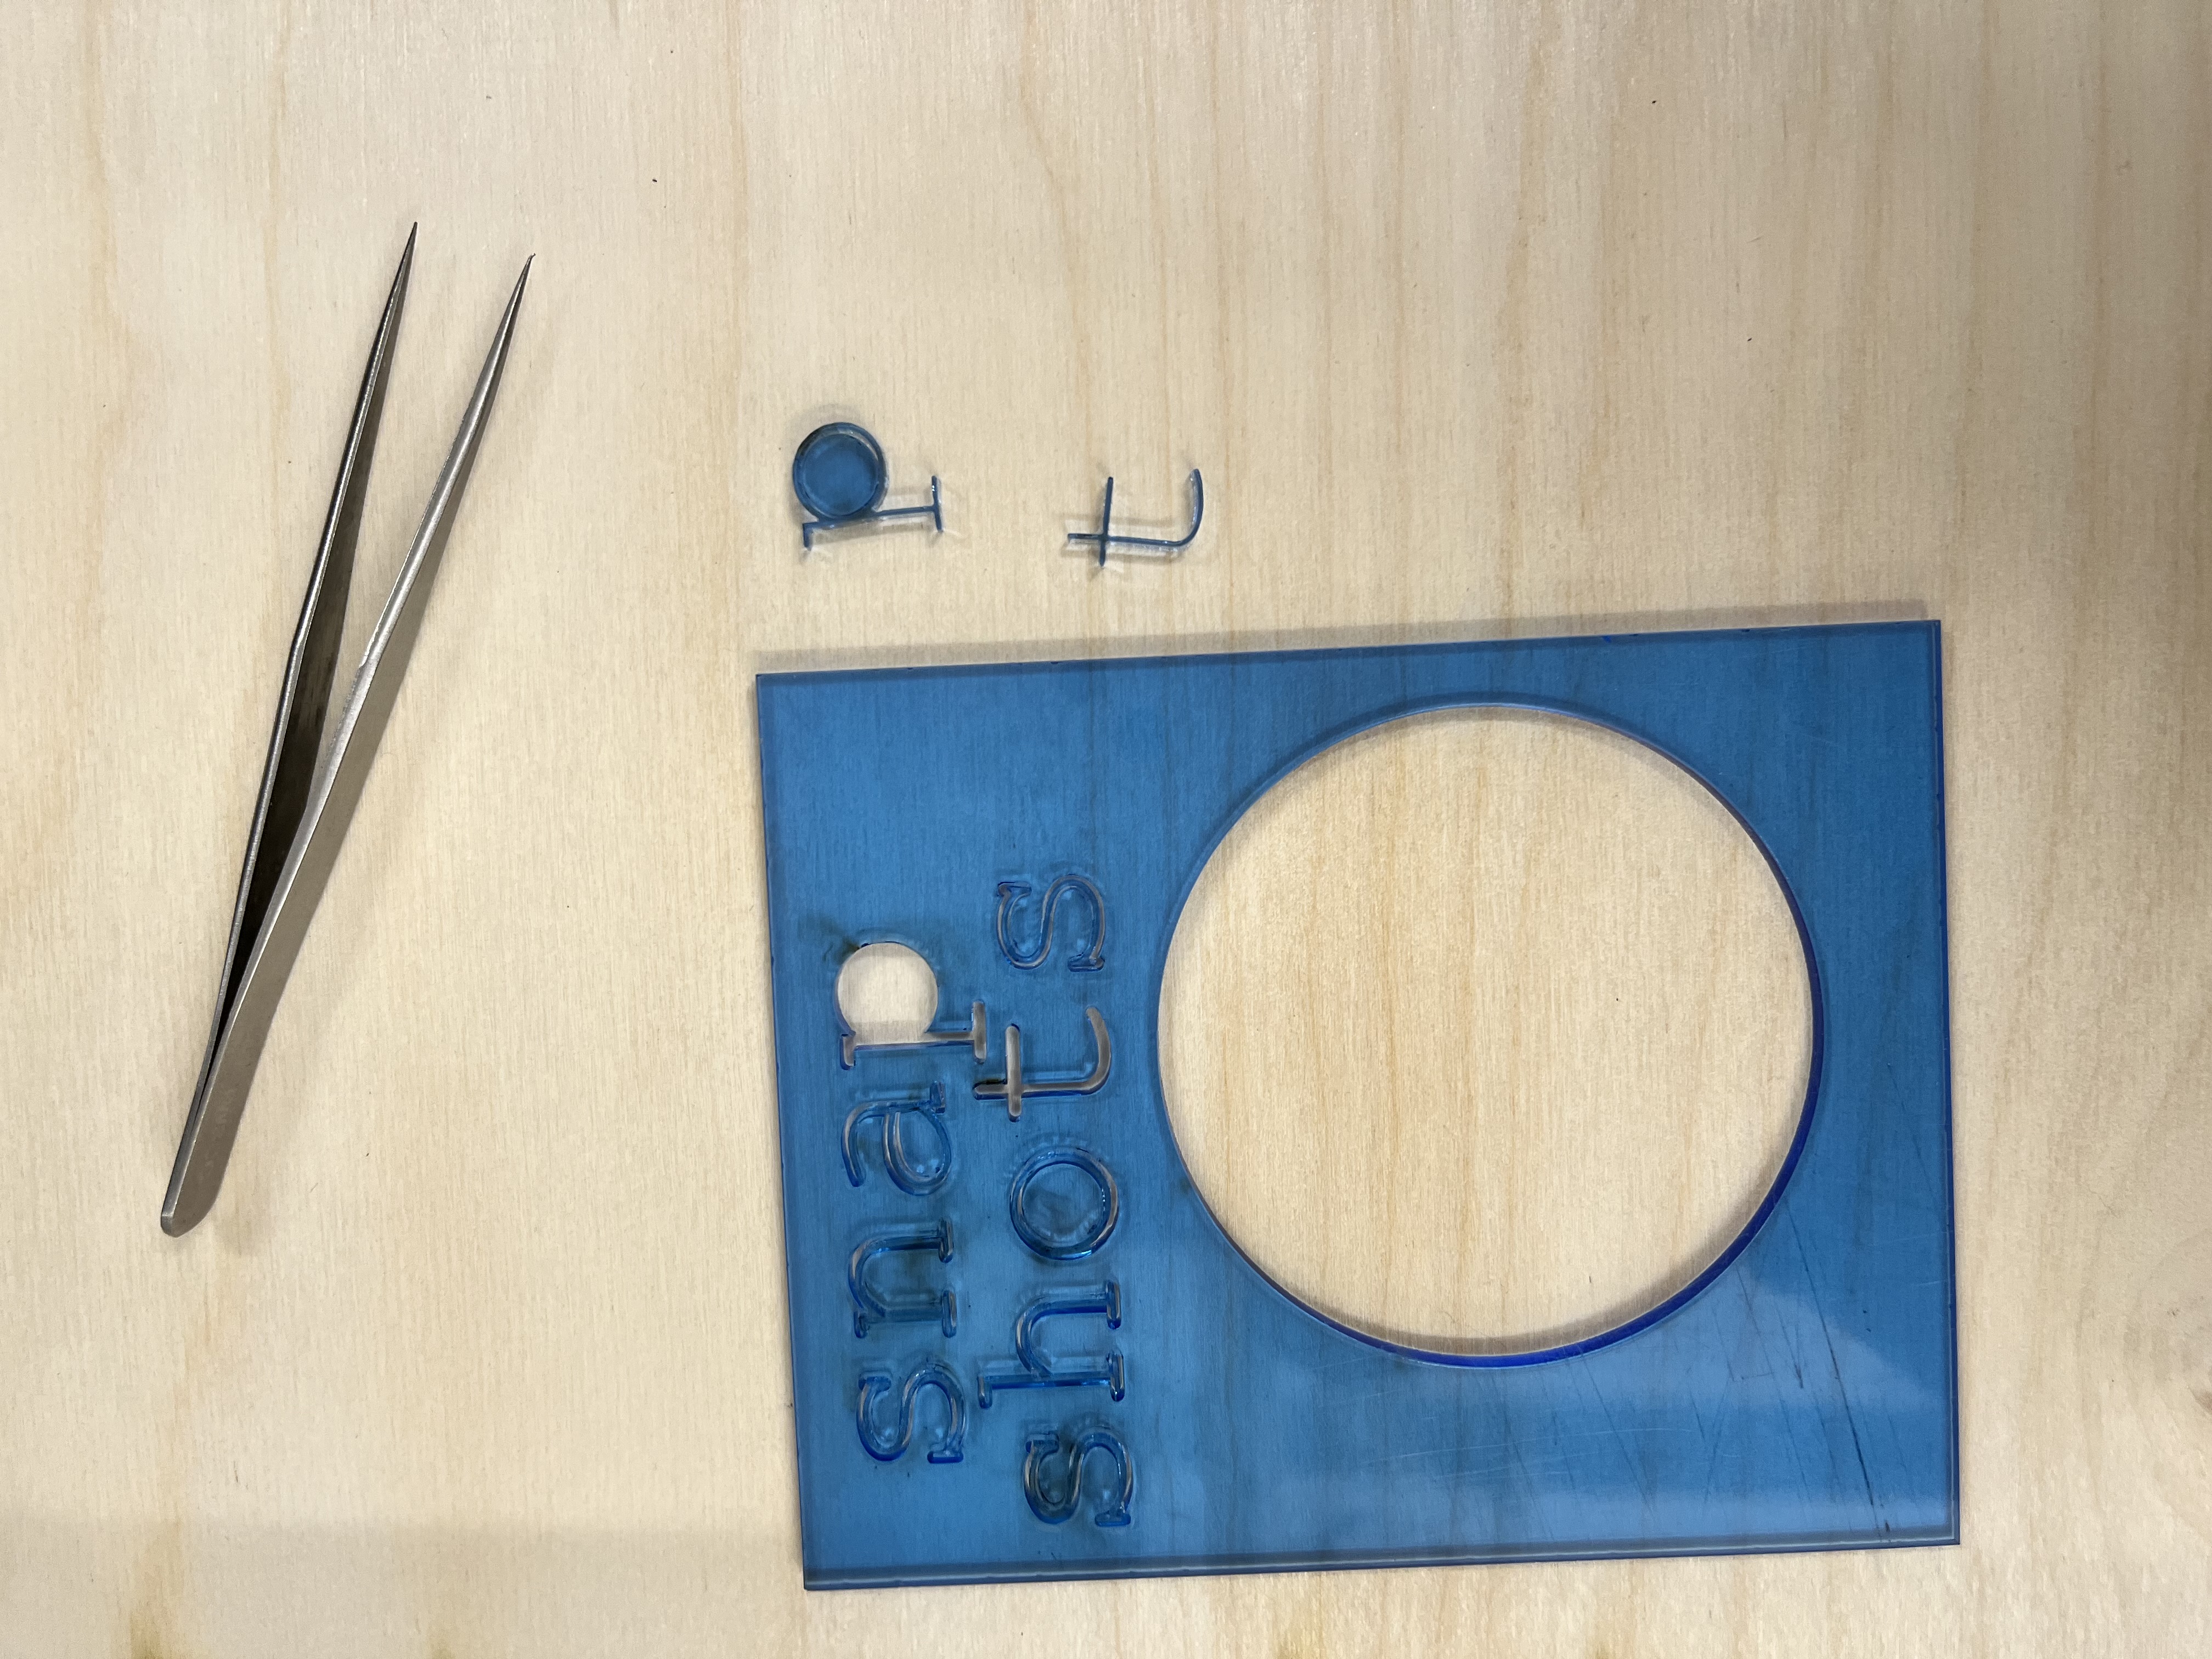
For the front face, I played around with different fonts and cuts vs. scores using some scrap acrylic, as well as experimented with the design on Rhino, briefly considering a horizontal box. Then, I made the same cut with thinner scrap light blue translucent acrylic to get the perfect inserts for my cutout "snap shots" lettering. Transparent tape on the other side lets the light through and not visible:
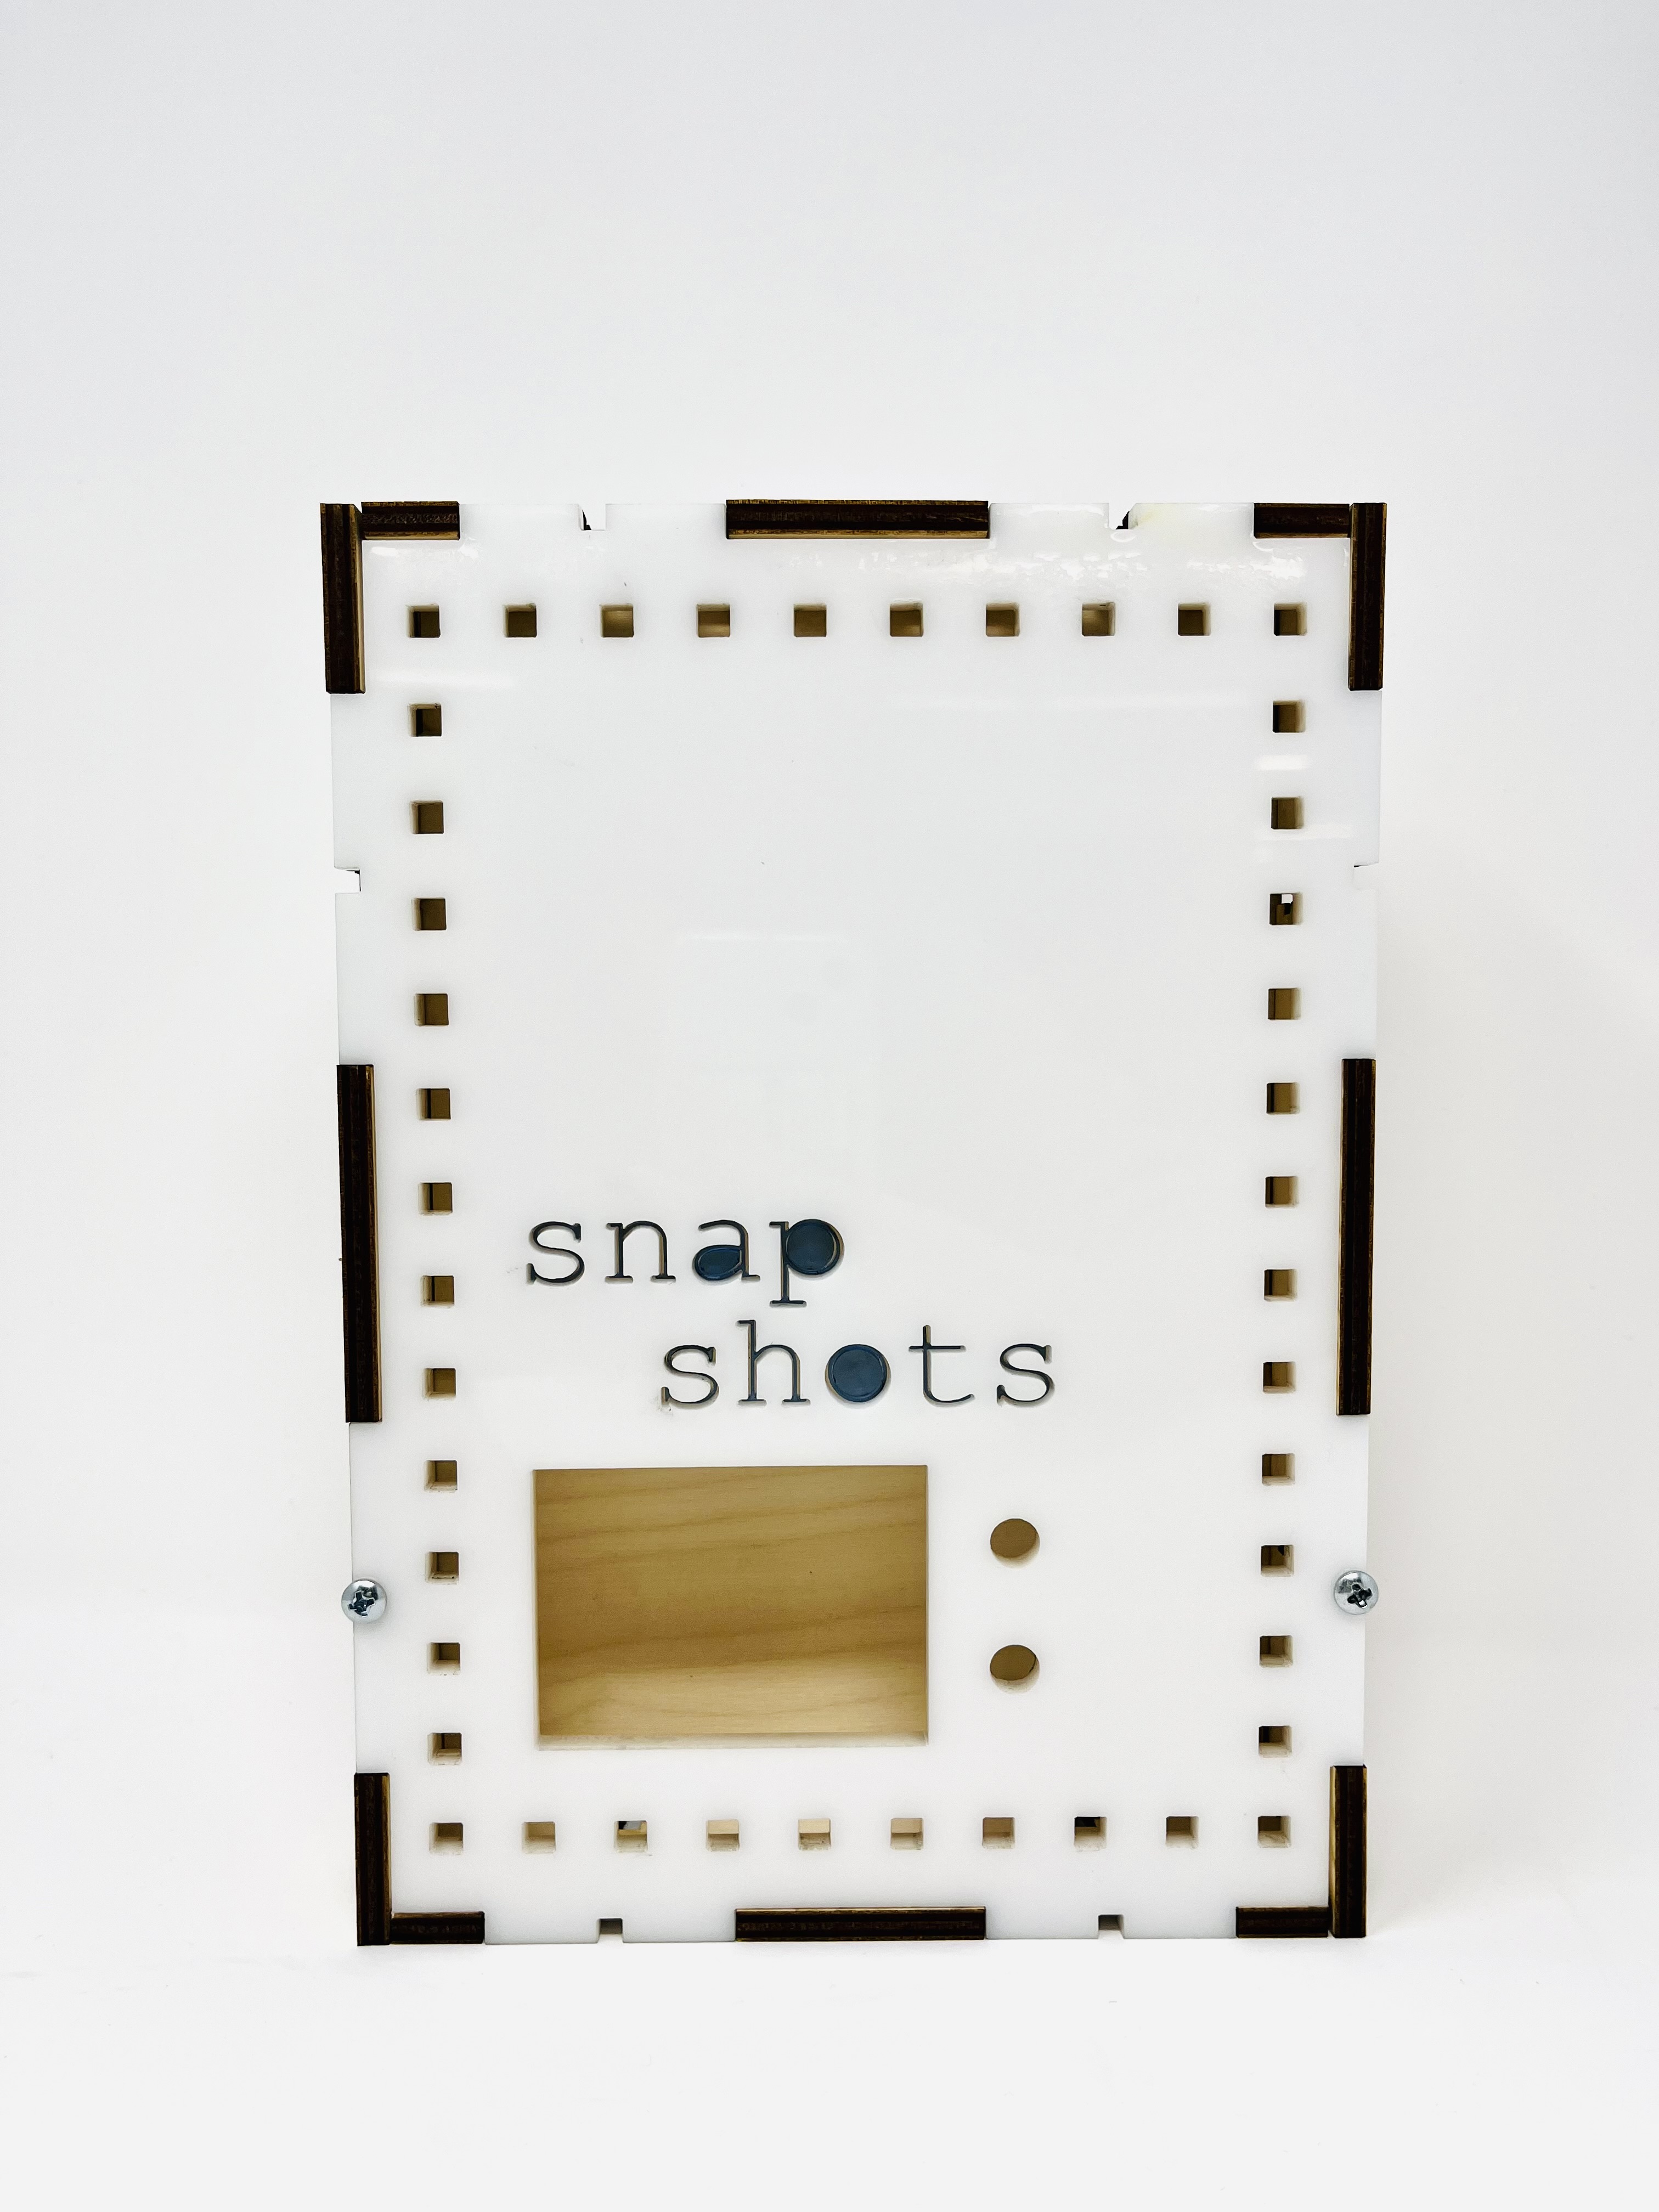
Put it all together, and I had my ideal press-fit no-glue box!
Download my CAD Files:
- Makercase Box Template
- Calibration Board
- Top of Box
- Bottom of Box
- Back and Front of Box
- Left and Right Sides of Box
2. Making the Vacuum-Formed Shotglass Holders
I didn't want to put the RFID tags directly onto my shotglasses -- sometimes they make the shotglass look less nice, or maybe they'd peel off over time --
so I created shotglass holders!
What makes creating these holders tricky is the unique shape of each shotglass. I experimented with a few different methods of creating these shotglass holders -- 3D designs, molding and casting, clamps -- but the clear winner was vacuum-formed plastic holders!
Unfortunately, I forgot to take a video of me doing said vacuum forming, but this was the mini vacuum forming machine and in each video, you can see how each shotglass holder looks. On the inside, at the bottom of each holder is an RFID tag sticker that allows the RFID reader to read the unique UID. (Which it can read from several inches away even with obstructing substances like acrylic or wood.)
(Apologies for not adding more photos: I left for China the day after the Project Fair and was separated from my dear shotglasses and their holders.)

The Process: Writing The Code
- screen, an integer that describes which screen we are currently viewing.
- shotID, a String that is "" if no tagged shotglass has yet been placed on the box and holds the unique UID of the most recent shotglass to be placed on the box.
- shotrowind, an integer that holds the row index of the current shotglass in the 2D array of shotglass information. By relying on this variable, I can cut down on active memory usage while the program is running.
1. 2.8" TFT SPI Display Code
To program the TFT display, I read through this tutorial
and utilized the TFT_eSPI Arduino library, starting with the "Font_Demo_1_Array" example.
Just one issue: the example uses delay to keep the screen steady between screen transitions! I, on the other hand, can't use delay because my RFID reader must always be on the lookout for a new shotglass.
- First, I simply had one screen be displayed whenever int screen was equal to that screen's number. Unfortunately, this resulted in the previous screen's text overflowing from behind the current screen's text -- a result of the constant looping. Even though I wrote code to fill the screen with black upon changing the screen, the screen variable is the previous screen for just a few loops before changing.
- Solution? Fill with black before each display. Unfortunately, that meant the screen kept flashing the words over and over again. During the fair, one individual said it was really difficult to read.
- Finally, Geoff suggested I utilize a while (true) loop, as he had done in his code. It was perfect! By putting all my display code before the while(true) loop, then putting all the other necessary looping functions like including monitoring for new shotglass UIDs and monitoring for screen changes (via button releases) into the while(true) loop, I was able to display the screen once, yet instantly change it upon a screen or shotglass change.
Final Code, but it's just the Display Code:
///////////////////////////////////////////
/*FONT STUFF*/
//  A processing sketch to create new fonts can be found in the Tools folder of TFT_eSPI
//  https://github.com/Bodmer/TFT_eSPI/tree/master/Tools/Create_Smooth_Font/Create_font

//  This sketch uses font files created from the Noto family of fonts:
//  https://www.google.com/get/noto/

#include "NotoSansBold15.h"
#include "NotoSansBold36.h"

// The font names are arrays references, thus must NOT be in quotes ""
#define AA_FONT_SMALL NotoSansBold15
#define AA_FONT_LARGE NotoSansBold36

#include <SPI.h>
#include <TFT_eSPI.h>       // Hardware-specific library

TFT_eSPI tft = TFT_eSPI();

//////////////////////////////////////////
void setup(void) {
  //Initialize important variables
  screen = 1;
  shotID = "";
  shotrowind = 0;

  //Begin Serial Monitor
  Serial.begin(9600);

  //SCREEN
  tft.begin();
  tft.setRotation(3); //Set orientation of screen
  tft.setTextColor(TFT_WHITE, TFT_BLACK, true); // Set the font colour AND the background colour
  tft.setCursor(0, 0); // Set cursor at top left of screen
  tft.setTextWrap(true); // Wrap on width
}


void loop() {

  /*DISPLAY*/
  if (screen == 1) {
    if (shotID == "") {
      tft.fillScreen(TFT_BLACK);
      tft.setCursor(0, 0); // Set cursor at top left of screen
      tft.loadFont(AA_FONT_SMALL);    // Must load the font first

      tft.setTextColor(TFT_WHITE, TFT_BLACK, true); // Set the font colour AND the background colour
      tft.println("Thank you for choosing Snap Shots!");
      tft.println("Please place a shotglass on the circle to get started.");
      tft.unloadFont(); // Remove the font to recover memory used
    }
    else {
      tft.fillScreen(TFT_BLACK);
      tft.setCursor(0, 0); // Set cursor at top left of screen
//      tft.loadFont(AA_FONT_SMALL);    // Must load the font first
      tft.setTextColor(TFT_CYAN, TFT_BLACK, true);

      tft.println("ABOUT THIS SHOTGLASS: ");
      tft.println("");


      tft.print("ID Number: ");
      tft.println(shots[shotrowind][0]);
      tft.println("");

      tft.print("Name: ");
      tft.println(shots[shotrowind][1]);
      tft.println("");

      tft.print("Date Acquired: ");
      tft.println(shots[shotrowind][2]);
      tft.println("");

      tft.print("Location Acquired: ");
      tft.println(shots[shotrowind][3]);
      tft.println("");

      tft.print("About: ");
      tft.println(shots[shotrowind][4]);
//      tft.unloadFont(); // Remove the font to recover memory used
    }
  }
  else if (screen==2) {
    tft.fillScreen(TFT_BLACK);
    tft.setCursor(0, 0); // Set cursor at top left of screen

    tft.loadFont(AA_FONT_SMALL);    // Must load the font first
    tft.setTextColor(TFT_WHITE, TFT_BLACK, true); // Set the font colour AND the background colour

    tft.setTextWrap(true); // Wrap on width
    tft.setTextColor(TFT_CYAN, TFT_BLACK, true);
    tft.println("LED KEY:");
    tft.println("");
    tft.println("Greens = A Gift");
    tft.println("Purples = From Outside America");
    tft.println("Rainbow = A Favorite Shotglass :D");
    tft.unloadFont(); // Remove the font to recover memory used
  }
  else {
    tft.fillScreen(TFT_BLACK);
    tft.setCursor(0, 0); // Set cursor at top left of screen

    tft.loadFont(AA_FONT_SMALL);    // Must load the font first

    tft.setTextColor(TFT_PURPLE, TFT_BLACK, true); // Set the font colour AND the background colour
    tft.setTextWrap(true); // Wrap on width
    tft.setTextColor(TFT_BLUE, TFT_BLACK, true);
//    tft.println("Get this -- Screen 3!!!");
    tft.println("You can find my website at https://guoingup.github.io/PS70-Digital-Fabrication/");
  }

  //WHILE LOOP
  while (true) {
    //Check for screen changes
    //Check for new shotglasses
    }
  }
  }
}
I also wanted to display a QR code to my website or some other photo using Flash PNG code, as seen here:
I temporarily scrapped this idea as there were a lot of debugging issue and the QR code doesn't add too much to the usability. I hope to implement it in the future, however!
2. Buttons and Screens
I used buttons to scroll through different screens, specifically an up button and a down button.
Simple push buttons like the ones I used all face a similar issue: they toggle between HIGH and LOW several times in what's called chattering.
I used this debounce tutorial and the ezButton.h Arduino library to solve this issue.
Then, I write code such that pressing the down or up button turns the screen black; releasing the down button increases the screen number by 1 (or goes from the last screen to the first screen) and releasing the up button decreases the screen number by (or goes from the first screen to the last screen). After the screen variable is changed, I break from the while (true) loop to allow for the display to change.
Final Code, but it's just the Button Code:
          /*Screen Number
          1 = Main screen
          2 = LED KEY
          3 = WEBSITE LINK or QR Code if time
          */

          int screen;
          String shotID;
          int shotrowind;

          ///////////////////////////////////////////
          /*BUTTON STUFF*/
          #include <ezButton.h>
          #define DEBOUNCE_TIME 50 // the debounce time in millisecond, increase this time if it still chatters
          ezButton upbutton(22); // create ezButton object that attach to pin GIOP21
          ezButton downbutton(21); // create ezButton object that attach to pin GIOP21

          void setup(void) {
            //Initialize important variables
            screen = 1;
            shotID = "";
            shotrowind = 0;

            //Begin Serial Monitor
            Serial.begin(9600);

            //BUTTON
            downbutton.setDebounceTime(DEBOUNCE_TIME); // set debounce time to 50 milliseconds
            upbutton.setDebounceTime(DEBOUNCE_TIME);
          }

            void loop() {
              /*DISPLAY*/
              if (screen == 1) {
                if (shotID == "") {
                  //display screen about placing a shotglass on to begin
                }
                else {
                  //display screen 1
                }
              }
              else if (screen==2) {
                //display screen 2
              }
              else {
                //display screen 3
              }

              //WHILE LOOP
              while (true) {
                downbutton.loop(); // MUST call the loop() function first
                upbutton.loop();

                if (downbutton.isPressed()) {
                  tft.fillScreen(TFT_BLACK);
                  Serial.println("The down button is pressed");
                }

                if (downbutton.isReleased()) {
                  Serial.println("The down button is released");
                  Serial.print("Screen number was: ");
                  Serial.println(screen);
                  if (screen == 3) {
                    screen = 1;
                  }
                  else {
                    screen++;
                  }
                  Serial.println("Screen number is now: ");
                  Serial.println(screen);
                  break;
                }

                if (upbutton.isPressed()) {
                  tft.fillScreen(TFT_BLACK);
                  Serial.println("The up button is pressed");
                }

                if (upbutton.isReleased()) {
                  Serial.println("The up button is released");
                  Serial.print("Screen number was: ");
                  Serial.println(screen);
                  if (screen == 1) {
                    screen = 3;
                  }
                  else {
                    screen--;
                  }
                  Serial.println("Screen number is now: ");
                  Serial.println(screen);
                  break;
                }


                //CHECK FOR NEW SHOTGLASS:
              }
            }
3. 2D Array, Excel, and RFID Reading
Finally, the arguably most important aspect of the code: recognizing specific shotglasses and outputting different information based upon that.
To store all of the shotglass information in the code, I created a 2D array of String objects:
          //CREATE ARRAY
          const int n_shotglasses = 5;
          const int n_parameters = 8;
          //1 (ID) 2 (Name) 3 (Date acquired) 4(Location acquired) 5(About) 6(Favorite?) 7(Gift?) 8(Outside US?)
          String shots[ n_shotglasses ][ n_parameters ] = {
          {"D7 F2 A1 75", "Luca's Hometown", "January 6th, 2023", "Basel, Switzerland","This shotglass represents winter break of 2022-2023, one of my favorite breaks of all time which I spent with my best friend Maddie, Luca, Stephanie, and Izzy from UCambridge! This shotglass came specifically from a shop in Basel, Switzerland, the hometown of my friend Luca where we stayed at his home for a night before heading to the Swiss alps for some snowboarding. Earlier on the trip we visited Madrid and London, too.","Yes","No","Yes"},
          {"D0 91 35 40", "Yellowstone", "Summer of 2013", "Yellowstone National Park","I got this shotglass and my Jackson Hole shotglass during a family vacation to Yellowstone National Park. I loved that trip. We drove through maybe 4 states? Including straight across Montana! So beautiful and so nice to see a different side of the states.","Yes","Yes","No"},
          {"57 C0 92 75", "Heart Art", "January 26th, 2022", "Dora's Place in Leverett House, Cambridge, MA","My good friend Dora gave me this shotglass (and the New York one!) when I came to visit her in Lev Tower after winter break in sophomore year.","No","Yes","No"},
          {"37 FA A1 75", "Texas", "November 2017", "Dallas, TX","I got this shotglass in Dallas during the 2017 SPJ Student Journalism Convention back when I was a sophomore in high school! I went with all the editors of my high school newspaper The Spoke, of which I would become editor-in-chief in senior year.","No","No","No"},
          {"C7 E0 A0 75", "Wonder Woman", "July 16, 2022", "Six Flags New England","For me, this shotglass represents the summer of 2022, one of the best summers of my life. That's where I met my best friend Maddie and all the PRIMOs in my life.","Yes","No","No"}
          };
To make it easy to edit and expand upon in the future, I created constant variables n_shotglasses (Number of shotglasses stored) and n_parameters (Number of parameters in each shotglass row) as the dimensions of the array. I also used Excel to create the 2D array "shots" that holds all of the shotglass information, simply CONCATENATE-ing the relevant columns with commas and brackets into Column A.

(Simply copy and paste the left column into the code that creates the 2D array.)
Then, whenever the RFID reader senses a new UID, it sets String variable shotID equal to the UID and iterates through each row in the array to find the shotglass that matches that UID. If it finds it, then it sets the integer variable shotrowind equal to that row index. Then, I halt PICC and encryption on the PCD (meaning the reader won't continue to register this current UID as a new UID), and break the while(true) loop, allowing for the screen to change to reflect information about the shotglass.
        shotID = content.substring(1);

                //Iterate through the array to find the right shotglass
                for (int i = 0; i < n_shotglasses; i++) {
                  if (shots[i][0] == shotID) {
                    shotrowind = i; //Set shotglass ID to the right one in the array
                  }
                }
Final Code, but it's just the RFID Code:
          ///////////////////////////////////////////
          /*RFID STUFF*/
          #include <SPI.h>
          #include <MFRC522.h>

          //#include "Constants.h"
          #include <WiFi.h>
          #include <HTTPClient.h>
          #include <ArduinoJson.h>

          #define SS_PIN  5  //ESP32 pin GIOP5
          #define RST_PIN 27 //ESP32 pin GIOP20

          MFRC522 rfid(SS_PIN, RST_PIN);


          //PIN SETUP:
          //ESP32-Mini
          //SDA --> ESP32 5 GPIO5
          //SCK --> ESP32 11 GPIO18
          //MOSI --> 23 GPIO23
          //MISO --> 19 GPIO19
          //IRQ attached to nothing
          //GND --> GND
          //RST --> 27 GPIO27
          //VCC --> 3.3V

          ///////////////////////////////////////////
          void setup(void) {
            //Initialize important variables
            screen = 1;
            shotID = "";
            shotrowind = 0;

            //Begin Serial Monitor
            Serial.begin(9600);

            //RFID
            // Connect to the wifi
          //  WiFi.begin(ssid, password);
          //  while (WiFi.status() != WL_CONNECTED) {
          //    delay(1000);
          //    Serial.println("Connecting to WiFi");
          //  }
          //  Serial.println("Connected to the WiFi network");

            SPI.begin(); // init SPI bus
            rfid.PCD_Init(); // init MFRC522

            Serial.println("Tap an RFID/NFC tag on the RFID-RC522 reader");
          }

          void loop() {
            /*DISPLAY*/

            //WHILE LOOP
            while (true) {
              //Check for buttons being pressed/screens being changed

              //CHECK FOR NEW SHOTGLASS:
              if (rfid.PICC_IsNewCardPresent()) { // new tag is available
              if (rfid.PICC_ReadCardSerial()) { // NUID has been readed
                // print Tag Type
                MFRC522::PICC_Type piccType = rfid.PICC_GetType(rfid.uid.sak);
                Serial.print("RFID/NFC Tag Type: ");
                Serial.println(rfid.PICC_GetTypeName(piccType));

                // print UID in Serial Monitor in the hex format
                Serial.print("UID:");
                String content = "";
                byte letter;
                for (byte i = 0; i < rfid.uid.size; i++) {
                  Serial.print(rfid.uid.uidByte[i] < 0x10 ? " 0" : " ");
                  Serial.print(rfid.uid.uidByte[i], HEX);
                  content.concat(String(rfid.uid.uidByte[i] < 0x10 ? " 0" : " "));
                  content.concat(String(rfid.uid.uidByte[i], HEX));
                }
                Serial.println();
                content.toUpperCase();
                Serial.println(content.substring(1));


                rfid.PICC_HaltA(); // halt PICC
                rfid.PCD_StopCrypto1(); // stop encryption on PCD
                break;
              }
            }
            }
          }
Put it all together, and you get my ...
Final Code!
/*Screen Number
1 = Main screen
2 = LED KEY
3 = WEBSITE LINK or QR Code if time
*/

int screen;
String shotID;
int shotrowind;

///////////////////////////////////////////
/*BUTTON STUFF*/
#include <ezButton.h>
#define DEBOUNCE_TIME 50 // the debounce time in millisecond, increase this time if it still chatters
ezButton upbutton(22); // create ezButton object that attach to pin GIOP21
ezButton downbutton(21); // create ezButton object that attach to pin GIOP21


///////////////////////////////////////////
/*RFID STUFF*/
#include <SPI.h>
#include <MFRC522.h>

//#include "Constants.h"
#include <WiFi.h>
#include <HTTPClient.h>
#include <ArduinoJson.h>

#define SS_PIN  5  //ESP32 pin GIOP5
#define RST_PIN 27 //ESP32 pin GIOP20

MFRC522 rfid(SS_PIN, RST_PIN);


//PIN SETUP:
//ESP32-Mini
//SDA --> ESP32 5 GPIO5
//SCK --> ESP32 11 GPIO18
//MOSI --> 23 GPIO23
//MISO --> 19 GPIO19
//IRQ attached to nothing
//GND --> GND
//RST --> 27 GPIO27
//VCC --> 3.3V

//WIFI PASSWORD STUFF
const char* ssid = "MAKERSPACE";
const char* password = "12345678";


///////////////////////////////////////////
/*NEOPIXEL STUFF*/
#include <Adafruit_NeoPixel.h>

#define LED_PIN   38   //not 9 The pin connected to the NeoPixels.
#define LED_COUNT 20  //The number of NeoPixels attached.
#define DELAY_VAL 100


//Declare our NeoPixel strip object:
//Arg 1: # of pixels; Arg 2: Arduino pin #; Arg 3: pixel type flags, add together as needed

Adafruit_NeoPixel strip(LED_COUNT, LED_PIN, NEO_GRB + NEO_KHZ800);


///////////////////////////////////////////
/*FONT STUFF*/
//  A processing sketch to create new fonts can be found in the Tools folder of TFT_eSPI
//  https://github.com/Bodmer/TFT_eSPI/tree/master/Tools/Create_Smooth_Font/Create_font

//  This sketch uses font files created from the Noto family of fonts:
//  https://www.google.com/get/noto/

#include "NotoSansBold15.h"
#include "NotoSansBold36.h"

// The font names are arrays references, thus must NOT be in quotes ""
#define AA_FONT_SMALL NotoSansBold15
#define AA_FONT_LARGE NotoSansBold36

#include <SPI.h>
#include <TFT_eSPI.h>       // Hardware-specific library

TFT_eSPI tft = TFT_eSPI();


//CREATE ARRAY
const int n_shotglasses = 5;
const int n_parameters = 8;
//1 (ID) 2 (Name) 3 (Date acquired) 4(Location acquired) 5(About) 6(Favorite?) 7(Gift?) 8(Outside US?)
String shots[ n_shotglasses ][ n_parameters ] = {
{"D7 F2 A1 75", "Luca's Hometown", "January 6th, 2023", "Basel, Switzerland","This shotglass represents winter break of 2022-2023, one of my favorite breaks of all time which I spent with my best friend Maddie, Luca, Stephanie, and Izzy from UCambridge! This shotglass came specifically from a shop in Basel, Switzerland, the hometown of my friend Luca where we stayed at his home for a night before heading to the Swiss alps for some snowboarding. Earlier on the trip we visited Madrid and London, too.","Yes","No","Yes"},
{"D0 91 35 40", "Yellowstone", "Summer of 2013", "Yellowstone National Park","I got this shotglass and my Jackson Hole shotglass during a family vacation to Yellowstone National Park. I loved that trip. We drove through maybe 4 states? Including straight across Montana! So beautiful and so nice to see a different side of the states.","Yes","Yes","No"},
{"57 C0 92 75", "Heart Art", "January 26th, 2022", "Dora's Place in Leverett House, Cambridge, MA","My good friend Dora gave me this shotglass (and the New York one!) when I came to visit her in Lev Tower after winter break in sophomore year.","No","Yes","No"},
{"37 FA A1 75", "Texas", "November 2017", "Dallas, TX","I got this shotglass in Dallas during the 2017 SPJ Student Journalism Convention back when I was a sophomore in high school! I went with all the editors of my high school newspaper The Spoke, of which I would become editor-in-chief in senior year.","No","No","No"},
{"C7 E0 A0 75", "Wonder Woman", "July 16, 2022", "Six Flags New England","For me, this shotglass represents the summer of 2022, one of the best summers of my life. That's where I met my best friend Maddie and all the PRIMOs in my life.","Yes","No","No"}
};


///////////////////////////////////////////
void setup(void) {
  //Initialize important variables
  screen = 1;
  shotID = "";
  shotrowind = 0;

  //Begin Serial Monitor
  Serial.begin(9600);

  //BUTTON
  downbutton.setDebounceTime(DEBOUNCE_TIME); // set debounce time to 50 milliseconds
  upbutton.setDebounceTime(DEBOUNCE_TIME);

  //RFID
  // Connect to the wifi
//  WiFi.begin(ssid, password);
//  while (WiFi.status() != WL_CONNECTED) {
//    delay(1000);
//    Serial.println("Connecting to WiFi");
//  }
//  Serial.println("Connected to the WiFi network");

  SPI.begin(); // init SPI bus
  rfid.PCD_Init(); // init MFRC522

  Serial.println("Tap an RFID/NFC tag on the RFID-RC522 reader");

  //NEOPIXEL
//  strip.begin();
//  strip.show(); //Initialize all pixels to off.
//  strip.setBrightness(12);


  //SCREEN
  tft.begin();
  tft.setRotation(3); //Set orientation of screen
  tft.setTextColor(TFT_WHITE, TFT_BLACK, true); // Set the font colour AND the background colour
  tft.setCursor(0, 0); // Set cursor at top left of screen
  tft.setTextWrap(true); // Wrap on width
}


void loop() {
  //NEOPIXEL

//  for(int i=0; i<LED_COUNT; i++) {
//    strip.rainbow(65535-(i*6553),1,255,255,true);
//    strip.show();
//    delay(100);
//  }

  //DISPLAY

  /*DISPLAY*/
  if (screen == 1) {
    if (shotID == "") {
      tft.fillScreen(TFT_BLACK);
      tft.setCursor(0, 0); // Set cursor at top left of screen
      tft.loadFont(AA_FONT_SMALL);    // Must load the font first

      tft.setTextColor(TFT_WHITE, TFT_BLACK, true); // Set the font colour AND the background colour
      tft.println("Thank you for choosing Snap Shots!");
      tft.println("Please place a shotglass on the circle to get started.");
      tft.unloadFont(); // Remove the font to recover memory used
    }
    else {
      tft.fillScreen(TFT_BLACK);
      tft.setCursor(0, 0); // Set cursor at top left of screen
//      tft.loadFont(AA_FONT_SMALL);    // Must load the font first
      tft.setTextColor(TFT_CYAN, TFT_BLACK, true);

      tft.println("ABOUT THIS SHOTGLASS: ");
      tft.println("");


      tft.print("ID Number: ");
      tft.println(shots[shotrowind][0]);
      tft.println("");

      tft.print("Name: ");
      tft.println(shots[shotrowind][1]);
      tft.println("");

      tft.print("Date Acquired: ");
      tft.println(shots[shotrowind][2]);
      tft.println("");

      tft.print("Location Acquired: ");
      tft.println(shots[shotrowind][3]);
      tft.println("");

      tft.print("About: ");
      tft.println(shots[shotrowind][4]);
//      tft.unloadFont(); // Remove the font to recover memory used
    }
  }
  else if (screen==2) {
    tft.fillScreen(TFT_BLACK);
    tft.setCursor(0, 0); // Set cursor at top left of screen

    tft.loadFont(AA_FONT_SMALL);    // Must load the font first
    tft.setTextColor(TFT_WHITE, TFT_BLACK, true); // Set the font colour AND the background colour

    tft.setTextWrap(true); // Wrap on width
    tft.setTextColor(TFT_CYAN, TFT_BLACK, true);
    tft.println("LED KEY:");
    tft.println("");
    tft.println("Greens = A Gift");
    tft.println("Purples = From Outside America");
    tft.println("Rainbow = A Favorite Shotglass :D");
    tft.unloadFont(); // Remove the font to recover memory used
  }
  else {
    tft.fillScreen(TFT_BLACK);
    tft.setCursor(0, 0); // Set cursor at top left of screen

    tft.loadFont(AA_FONT_SMALL);    // Must load the font first

    tft.setTextColor(TFT_PURPLE, TFT_BLACK, true); // Set the font colour AND the background colour
    tft.setTextWrap(true); // Wrap on width
    tft.setTextColor(TFT_BLUE, TFT_BLACK, true);
//    tft.println("Get this -- Screen 3!!!");
    tft.println("You can find my website at https://guoingup.github.io/PS70-Digital-Fabrication/");
  }

  //WHILE LOOP
  while (true) {
    downbutton.loop(); // MUST call the loop() function first
    upbutton.loop();

    if (downbutton.isPressed()) {
      tft.fillScreen(TFT_BLACK);
      Serial.println("The down button is pressed");
    }

    if (downbutton.isReleased()) {
      Serial.println("The down button is released");
      Serial.print("Screen number was: ");
      Serial.println(screen);
      if (screen == 3) {
        screen = 1;
      }
      else {
        screen++;
      }
      Serial.println("Screen number is now: ");
      Serial.println(screen);
      break;
    }

    if (upbutton.isPressed()) {
      tft.fillScreen(TFT_BLACK);
      Serial.println("The up button is pressed");
    }

    if (upbutton.isReleased()) {
      Serial.println("The up button is released");
      Serial.print("Screen number was: ");
      Serial.println(screen);
      if (screen == 1) {
        screen = 3;
      }
      else {
        screen--;
      }
      Serial.println("Screen number is now: ");
      Serial.println(screen);
      break;
    }


    //CHECK FOR NEW SHOTGLASS:
    if (rfid.PICC_IsNewCardPresent()) { // new tag is available
    if (rfid.PICC_ReadCardSerial()) { // NUID has been readed
      // print Tag Type
      MFRC522::PICC_Type piccType = rfid.PICC_GetType(rfid.uid.sak);
      Serial.print("RFID/NFC Tag Type: ");
      Serial.println(rfid.PICC_GetTypeName(piccType));

      // print UID in Serial Monitor in the hex format
      Serial.print("UID:");
      String content = "";
      byte letter;
      for (byte i = 0; i < rfid.uid.size; i++) {
        Serial.print(rfid.uid.uidByte[i] < 0x10 ? " 0" : " ");
        Serial.print(rfid.uid.uidByte[i], HEX);
        content.concat(String(rfid.uid.uidByte[i] < 0x10 ? " 0" : " "));
        content.concat(String(rfid.uid.uidByte[i], HEX));
      }
      Serial.println();
      content.toUpperCase();
      Serial.println(content.substring(1));

      shotID = content.substring(1);

      //Iterate through the array to find the right shotglass
      for (int i = 0; i < n_shotglasses; i++) {
        if (shots[i][0] == shotID) {
          shotrowind = i; //Set shotglass ID to the right one in the array
        }
      }
      rfid.PICC_HaltA(); // halt PICC
      rfid.PCD_StopCrypto1(); // stop encryption on PCD
      break;
    }
  }
  }
}
Future Hopes
1. More Shotglasses
Of course, I would love to create and tag more shotglass holders! I've still got 70+ left to tag, and can buy lots of plastic sheets to vacuum form online.
2. LED Integration
As indicated by the NeoPixel strip outlaid along the square cutouts on the top face of the box, I had originally planned on including the LED strip as part of Snap Shots.
Unfortunately, it seems as though it shorted out, as after the project fair, the strip stopped lighting up despite lots of finagling.
Also, the LEDs are meant to indicate some information about the shotglasses themselves! I was going to have them light up in a rainbow fashion if it was one of my favorite shotglasses,
or as green if it was a gift, or as purple if they were procured outside the United States. This would require communication between the ESP32-DevKitM-1 and the ESP32-S2-SOLO controlling the pixel strip OR editing of the code such that the pixels can light up without using the delay function.
3. Website Integration
I would like for one screen to display a QR code that leads to a website that also displays my shotglasses. And when placed on the box, the ESP32 would refresh a special page on that website to reflect the shotglass currently on the box.
4. Button Usage
Finally, I have 2 buttons! It occurs to me that only one needs to flip through screens, since you will eventually get to the next screen with enough flipping.
Thus, the 2nd button could be used for a number of functions, including turning the box on or off, resetting the box, or acting as a "yes" button to maximize screen utility.
Thank You! Claire Out